WarriorYu

山中莫道无供给,明月清风不用钱


  • 首页

  • 标签

  • 分类

  • 归档

学习算法思想

发表于 2020-08-05 | 分类于 算法和数据结构

学习算法思想

第一章:当我们在讨论算法的时候,我们在讨论什么?

  1. 我们究竟为什么要学习算法

  2. 课程介绍

第二章:排序基础

​ 2-1 选择排序法
​ 2-2 使用模板(泛型)编写算法
​ 2-3 随机生成算法测试用例
​ 2-4 测试算法的性能
​ 2-5 插入排序法
​ 2-6 插入排序法的改进
​ 2-7 更多关于O(n*2)排序算法的思考

  1. 冒泡排序(n²):
  2. 选择排序(n²): 在[i..n)未排序的数组里获取最小的值放在已排序数组的后面,即放在i的位置。
    缺点:两层循环必须都执行完,所以效率低。
  3. 插入排序(n²):在未排序数组中取第一个数,跟已排序的数组元素比较,插入到合适的位置。
    优点:在数组近乎有序的情况下,可以O(n)的时间复杂度。设置比O(nlogn)效率还要高。

第三章:高级排序问题

​ 3-1 归并排序法
​ 3-2 归并排序法的实现
​ 3-3 归并排序法的优化
​ 3-4 自底向上的归并排序算法
​ 3-5 快速排序法
​ 3-6 随机化快速排序法
​ 3-7 双路快速排序法
​ 3-8 三路快速排序法
​ 3-9 归并排序和快速排序的衍生问题

第四章:堆和堆排序

​ 4-1 为什么使用堆
​ 4-2 堆的基本存储
​ 4-3 Shift Up
​ 4-4 Shift Down
​ 4-5 基础堆排序和Heapify
​ 4-6 优化的堆排序
​ 4-7 排序算法总结
​ 4-8 索引堆
​ 4-9 索引堆的优化
​ 4-10 和堆相关的其他问题

  1. 二叉树(Binary Tree): 二叉树,顾名思义,每个节点最多有两个“叉”,也就是两个子节点,分别是左子节点和右子节点。不过,二叉树并不要求每个节点都有两个子节点,有的节点只有左子节点,有的节点只有右子节点。

  2. 二叉查找树(Binary Search Tree): 二叉查找树是二叉树中最常用的一种类型,也叫二叉搜索树。顾名思义,二叉查找树是为了实现快速查找而生的。不过,它不仅仅支持快速查找一个数据,还支持快速插入、删除一个数据。它是怎么做到这些的呢?这些都依赖于二叉查找树的特殊结构。二叉查找树要求,在树中的任意一个节点,其左子树中的每个节点的值,都要小于这个节点的值,而右子树节点的值都大于这个节点的值。

  3. 满二叉树: 二叉树中,叶子节点全都在最底层,除了叶子节点之外,每个节点都有左右两个子节点,这种二叉树就叫作满二叉树。

  4. 完全二叉树: 二叉树中,叶子节点都在最底下两层,最后一层的叶子节点都靠左排列,并且除了最后一层,其他层的节点个数都要达到最大,这种二叉树叫作完全二叉树。

  5. 二叉堆: 堆是一个完全二叉树;堆中每一个节点的值都必须大于等于(或小于等于)其子树中每个节点的值。

    实现一个堆:

    • 将n个元素逐个插入到一个空堆中,时间复杂度 是O(nlogn)。需要开辟额外的空间,空间复杂度是O(n)。

    • 从2/n的位置开始heapify的过程,算法复杂度为O(n)。在原数组实现为堆,空间复杂度是O(1)。

    堆的使用:用于排序,求第K大的元素等。

    • 大顶堆
    • 小顶堆

    堆排序的时间复杂度O(nlogn)

第五章:二分搜索树

​ 5-1 二分查找法
​ 5-2 二分搜索树基础
​ 5-3 二分搜索树的节点插入
​ 5-4 二分搜索书的查找
​ 5-5 二分搜索树的遍历(深度优先遍历)
​ 5-6 层序遍历(广度优先遍历)
​ 5-7 删除最大值,最小值
​ 5-8 二分搜索树的删除
​ 5-9 二分搜索树的顺序性
​ 5-10 二分搜索树的局限性
​ 5-11 树形问题和更多树。

  1. 二叉搜索树:二叉查找树(Binary Search Tree)二叉查找树是二叉树中最常用的一种类型,也叫二叉搜索树。顾名思义,二叉查找树是为了实现快速查找而生的。不过,它不仅仅支持快速查找一个数据,还支持快速插入、删除一个数据。它是怎么做到这些的呢?这些都依赖于二叉查找树的特殊结构。二叉查找树要求,在树中的任意一个节点,其左子树中的每个节点的值,都要小于这个节点的值,而右子树节点的值都大于这个节点的值。
  2. 红黑树:平衡二叉树。

**(这一章往后还没有看)

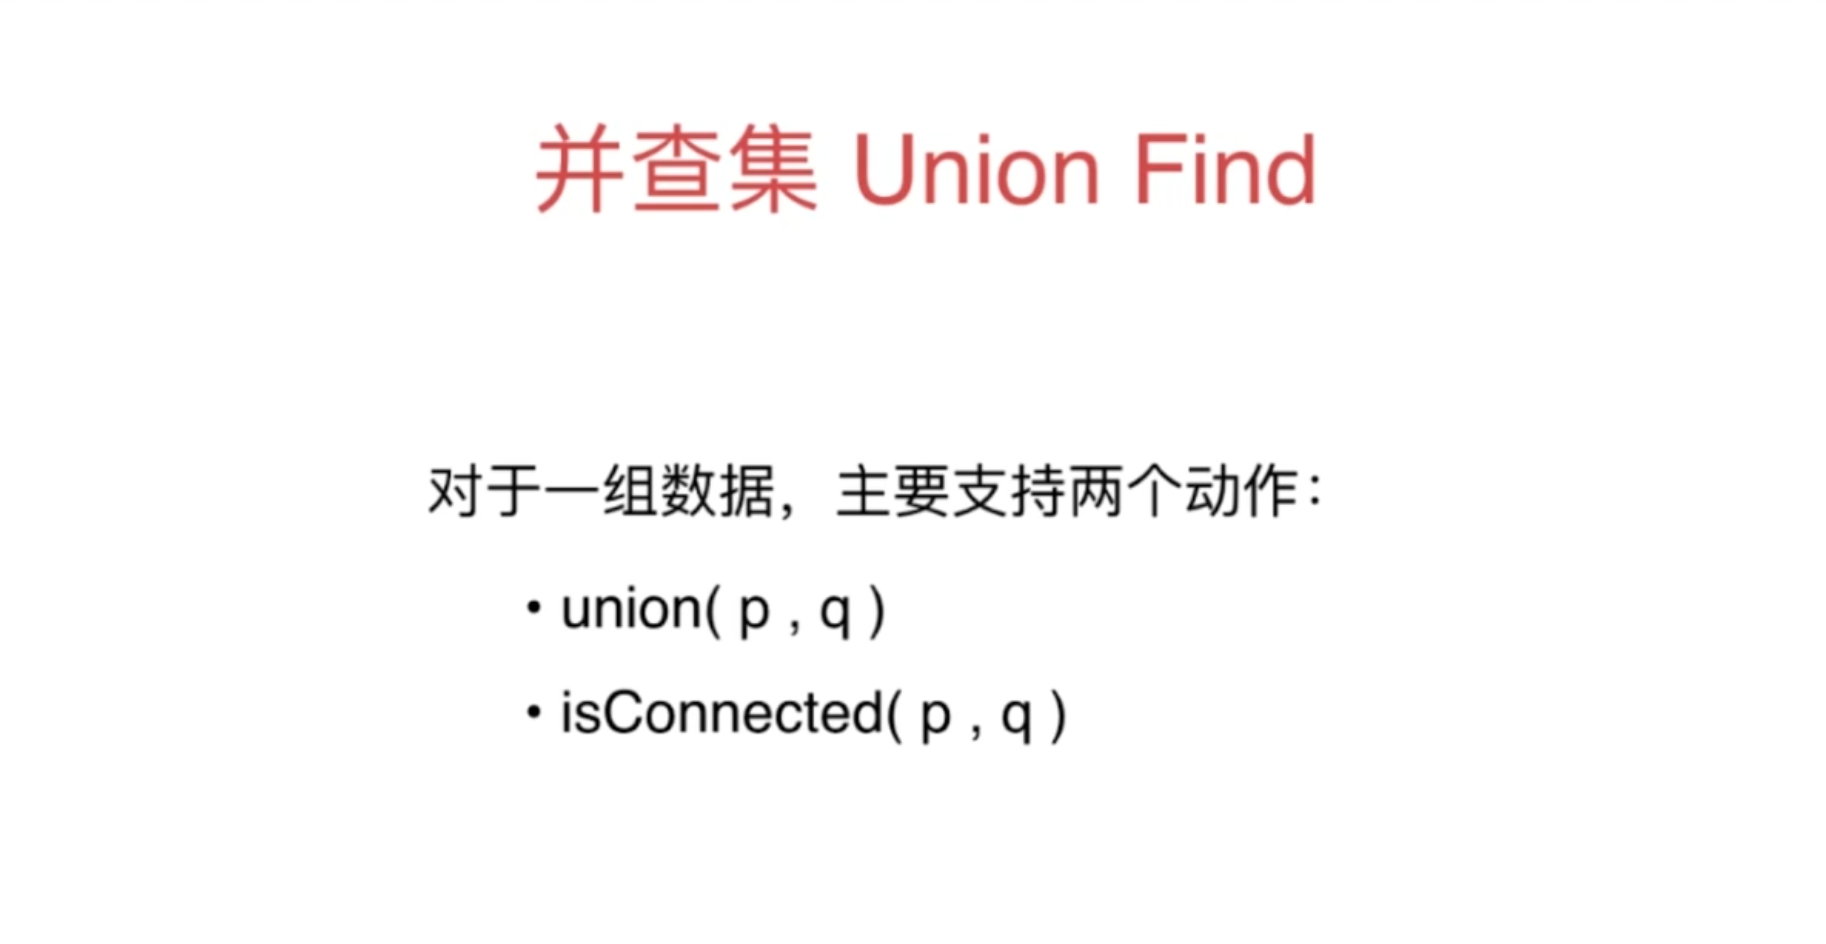
第六章:并查集

​ 6-1 并查集基础
​ 6-2 Qucik Find
​ 6-3 Quick Union
​ 6-4 基于size的优化
​ 6-5 基于rank的优化
​ 6-6 路径压缩

第七章:

​ 7-1 图论基础
​ 7-2 图的表示
​ 7-3 相邻点迭代器
​ 7-4 图的算法框架
​ 7-5 深度优先遍历和联通分量
​ 7-6 寻路
​ 7-7 广度优先遍历和最短路径
​ 7-8 迷宫生成,ps抠图–更多无权图的应用

第八章:最小生成树

​ 8-1 有权图
​ 8-2 最小生成树问题和切分定理
​ 8-3 Prim算法的第一个实现
​ 8-4 Prim算法的优化
​ 8-5 优化后的Prim算法的实现
​ 8-6 Krusk算法
​ 8-7 最小生成树算法的思考

第九章:最短路径

​ 9-1 最短路径问题和松弛操作
​ 9-2 Dijkstra算法的思想
​ 9-3 实现Dijkstra算法
​ 9-4 负权边和Bellman-Ford算法
​ 9-5 实现Bellman-Ford算法
​ 9-6 更多和最短路径相关的思考

第十章:结束语

​ 10-1 总结,算法思想,大家加油!

(二)Glide源码解析之缓存机制

发表于 2020-08-05 | 分类于 Android源码分析

(二)Glide源码解析之缓存机制

1. Glide的缓存介绍:

  • 活动缓存:
  • 内存缓存
  • 磁盘缓存

2. 缓存Key :

从Engine的load()方法里开始分析。我们根据下面的代码看Key是怎么生成的。

1
2
3
4
5
6
7
8
9
10
11
12
13
14
15
16
17
18
19
20
21
22
23
24
25
public <R> LoadStatus load(
GlideContext glideContext,
Object model,
Key signature,
int width,
int height,
Class<?> resourceClass,
Class<R> transcodeClass,
Priority priority,
DiskCacheStrategy diskCacheStrategy,
Map<Class<?>, Transformation<?>> transformations,
boolean isTransformationRequired,
boolean isScaleOnlyOrNoTransform,
Options options,
boolean isMemoryCacheable,
boolean useUnlimitedSourceExecutorPool,
boolean useAnimationPool,
boolean onlyRetrieveFromCache,
ResourceCallback cb) {
...
// 这里有8个参数,其中model是图片的地址
EngineKey key = keyFactory.buildKey(model, signature, width, height, transformations,
resourceClass, transcodeClass, options);
...
}

可以看出key的生成,是通过图片的地址、宽高以及给图片设置的其他参数一起组合,生成了Key。生成Key主要是通过在EngineKey中重写了equals()和hashCode()方法,保证所有参数相同的情况下,才认为是同一个Key。

3. 内存缓存

内存缓存分为两部分

  • 活动缓存 (弱引用)
  • 内存缓存

当Glide加载完一张图片后,首先会放到活动缓存,当需要从活动缓存移除时,会保存到内存缓存。这样下次加载同一张图片时,不需要从网络或者磁盘上加载,只要内存中有这张图片,就直接在内存中加载。既省了流量,也提高了加载显示图片的效率,因为加载内存中图片是最快的。

1
2
3
4
Glide.with(this)
.load("")
.skipMemoryCache(false)// 默认是使用缓存的,可以自由配置
.into(imageView);

从加载内存缓存的代码开始分析

1
2
3
4
5
6
7
8
9
10
11
12
13
14
15
16
17
18
19
20
21
22
23
24
25
26
27
28
29
30
31
32
33
34
35
36
37
38
39
40
41
42
43
44
45
46
47
48
49
50
51
52
53
54
55
56
57
58
59
60
61
62
63
64
65
public class Engine implements EngineJobListener,
MemoryCache.ResourceRemovedListener,
EngineResource.ResourceListener {
public <R> LoadStatus load(
GlideContext glideContext,
Object model,
Key signature,
int width,
int height,
Class<?> resourceClass,
Class<R> transcodeClass,
Priority priority,
DiskCacheStrategy diskCacheStrategy,
Map<Class<?>, Transformation<?>> transformations,
boolean isTransformationRequired,
boolean isScaleOnlyOrNoTransform,
Options options,
boolean isMemoryCacheable,
boolean useUnlimitedSourceExecutorPool,
boolean useAnimationPool,
boolean onlyRetrieveFromCache,
ResourceCallback cb) {
Util.assertMainThread();
long startTime = VERBOSE_IS_LOGGABLE ? LogTime.getLogTime() : 0;

EngineKey key = keyFactory.buildKey(model, signature, width, height, transformations,
resourceClass, transcodeClass, options);


//分析点1:活动缓存
EngineResource<?> active = loadFromActiveResources(key, isMemoryCacheable);
if (active != null) {
//活动缓存里有,则直接回调
cb.onResourceReady(active, DataSource.MEMORY_CACHE);
if (VERBOSE_IS_LOGGABLE) {
logWithTimeAndKey("Loaded resource from active resources", startTime, key);
}
return null;
}
//分析点2:内存缓存
EngineResource<?> cached = loadFromCache(key, isMemoryCacheable);
if (cached != null) {
cb.onResourceReady(cached, DataSource.MEMORY_CACHE);
if (VERBOSE_IS_LOGGABLE) {
logWithTimeAndKey("Loaded resource from cache", startTime, key);
}
return null;
}

@Nullable
private EngineResource<?> loadFromActiveResources(Key key, boolean isMemoryCacheable) {
//判断是否需要缓存,不需要的话,直接返回null
if (!isMemoryCacheable) {
return null;
}
// 分析点1.1
//这里
EngineResource<?> active = activeResources.get(key);
if (active != null) {
//在活动缓存中成功获取到,则+1,这个操作的作用就相当于记录资源的引用次数
active.acquire();
}
return active;
}
}

分析1.1

1
2
3
4
5
6
7
8
9
10
11
12
13
14
15
16
final class ActiveResources {
synchronized EngineResource<?> get(Key key) {
//ResourceWeakReference 是弱引用,GC的时候,把活动缓存回收
ResourceWeakReference activeRef = activeEngineResources.get(key);
if (activeRef == null) {
return null;
}
EngineResource<?> active = activeRef.get();
if (active == null) {
//
cleanupActiveReference(activeRef);
}
return active;
}
}
}

//分析2:内存缓存

1
2
3
4
5
6
7
8
9
10
11
12
13
14
15
16
17
18
19
20
21
22
23
24
25
26
27
28
29
30
31
32
33
34
35
36
37
38
public class Engine implements EngineJobListener,
MemoryCache.ResourceRemovedListener,
EngineResource.ResourceListener {

private EngineResource<?> loadFromCache(Key key, boolean isMemoryCacheable) {
//判断是否需要缓存,不需要的话,直接返回null
if (!isMemoryCacheable) {
return null;
}
//分析点2.1:
//获取缓存
EngineResource<?> cached = getEngineResourceFromCache(key);
if (cached != null) {
//在内存缓存中成功获取到,则+1,这个操作的作用就相当于记录资源的引用次数
cached.acquire();
//分析点2.2
//添加到活动缓存
activeResources.activate(key, cached);
}
return cached;
}

private EngineResource<?> getEngineResourceFromCache(Key key) {
//从缓存中取出,并且从缓存中删除
Resource<?> cached = cache.remove(key);

final EngineResource<?> result;
if (cached == null) {
result = null;
} else if (cached instanceof EngineResource) {
// Save an object allocation if we've cached an EngineResource (the typical case).
result = (EngineResource<?>) cached;
} else {
result = new EngineResource<>(cached, true /*isMemoryCacheable*/, true /*isRecyclable*/);
}
return result;
}
}

分析2.1:

1
2
3
4
5
6
7
8
9
10
11
12
13
14
public final class GlideBuilder {
Glide build(@NonNull Context context) {
...

if (memoryCache == null) {
//LruResourceCache extends LruCache,内存缓存是基于LruCache算法实现的
memoryCache = new LruResourceCache(memorySizeCalculator.getMemoryCacheSize());
}

if (diskCacheFactory == null) {
diskCacheFactory = new InternalCacheDiskCacheFactory(context);
}
...
}

分析点2.2:

activeResources就是一个弱引用的HashMap,用来缓存正在使用中的图片,我们可以看到,loadFromActiveResources()方法就是从activeResources这个HashMap当中取值的。使用activeResources来缓存正在使用中的图片,可以保护这些图片不会被LruCache算法回收掉。

(一)Glide源码解析之整体流程

发表于 2020-08-05 | 分类于 Android源码分析

(一)Glide源码解析之整体流程

  1. 使用Glide,我们就完全不用担心图片内存浪费,甚至是内存溢出的问题。因为Glide从来都不会直接将图片的完整尺寸全部加载到内存中,而是用多少加载多少。Glide会自动判断ImageView的大小,然后只将这么大的图片像素加载到内存当中,帮助我们节省内存开支。

  2. 我们分析这行最简单的加载图片的代码:Glide.wih(this).load(url).into(imageView);

  3. Glide.with(…)方法:

    with()静态方法,有以下几个重载方法

    1
    2
    3
    4
    5
    6
    7
    8
    9
    10
    11
    12
    13
    14
    15
    16
    17
    18
    19
    20
    21
    22
    23
    24
    25
    26
    27
    28
    29
    30
    31
    32
    33
    public class Glide implements ComponentCallbacks2 { 
    @NonNull
    public static RequestManager with(@NonNull Context context) {
    return getRetriever(context).get(context);
    }

    @NonNull
    public static RequestManager with(@NonNull Activity activity) {
    return getRetriever(activity).get(activity);
    }

    @NonNull
    public static RequestManager with(@NonNull FragmentActivity activity) {
    return getRetriever(activity).get(activity);
    }

    @NonNull
    public static RequestManager with(@NonNull Fragment fragment) {
    return getRetriever(fragment.getActivity()).get(fragment);
    }

    @SuppressWarnings("deprecation")
    @Deprecated
    @NonNull
    public static RequestManager with(@NonNull android.app.Fragment fragment) {
    return getRetriever(fragment.getActivity()).get(fragment);
    }

    @NonNull
    public static RequestManager with(@NonNull View view) {
    return getRetriever(view.getContext()).get(view);
    }
    }

    Glide.with(…)方法可以传入Activity、FragmentActivity、android.support.v4.app.Fragment、android.app.Fragment、View。with()方法里面都是通过getRetriever(…)方法得到RequestManagerRetriever对象。然后通过RequestManagerRetriever的get(…)方法得到RequestManager对象。

下面我们看看RequestManagerRetriever类里几个重载的get(…)方法,即获取RequestManager的几个相关方法。

1
2
3
4
5
6
7
8
9
10
11
12
13
14
15
16
17
18
19
20
21
22
23
24
25
26
27
28
29
30
31
32
33
34
35
36
37
38
39
40
41
42
43
44
45
46
47
48
49
50
51
52
53
54
55
56
57
58
59
60
61
62
63
64
65
66
67
68
69
70
71
72
73
74
75
76
77
78
79
80
81
82
83
84
85
86
87
88
89
90
91
92
93
94
95
96
97
98
99
100
101
102
103
104
105
106
107
108
109
110
111
112
113
114
115
116
117
118
119
120
121
122
123
124
125
126
127
128
129
130
131
132
133
134
135
136
137
138
139
140
141
142
143
144
145
146
147
148
149
150
151
152
153
154
public class RequestManagerRetriever implements Handler.Callback {
@NonNull
public RequestManager get(@NonNull Context context) {
if (context == null) {
throw new IllegalArgumentException("You cannot start a load on a null Context");
} else if (Util.isOnMainThread() && !(context instanceof Application)) {
if (context instanceof FragmentActivity) {
return get((FragmentActivity) context);
} else if (context instanceof Activity) {
return get((Activity) context);
} else if (context instanceof ContextWrapper) {
return get(((ContextWrapper) context).getBaseContext());
}
}

return getApplicationManager(context);
}

@NonNull
public RequestManager get(@NonNull FragmentActivity activity) {
if (Util.isOnBackgroundThread()) {
return get(activity.getApplicationContext());
} else {
assertNotDestroyed(activity);
FragmentManager fm = activity.getSupportFragmentManager();
return supportFragmentGet(
activity, fm, /*parentHint=*/ null, isActivityVisible(activity));
}
}

@NonNull
public RequestManager get(@NonNull Fragment fragment) {
Preconditions.checkNotNull(fragment.getActivity(),
"You cannot start a load on a fragment before it is attached or after it is destroyed");
if (Util.isOnBackgroundThread()) {
return get(fragment.getActivity().getApplicationContext());
} else {
FragmentManager fm = fragment.getChildFragmentManager();
return supportFragmentGet(fragment.getActivity(), fm, fragment, fragment.isVisible());
}
}

@SuppressWarnings("deprecation")
@NonNull
public RequestManager get(@NonNull Activity activity) {
if (Util.isOnBackgroundThread()) {
return get(activity.getApplicationContext());
} else {
assertNotDestroyed(activity);
android.app.FragmentManager fm = activity.getFragmentManager();
return fragmentGet(
activity, fm, /*parentHint=*/ null, isActivityVisible(activity));
}
}

@SuppressWarnings("deprecation")
@NonNull
public RequestManager get(@NonNull View view) {
if (Util.isOnBackgroundThread()) {
return get(view.getContext().getApplicationContext());
}

Preconditions.checkNotNull(view);
Preconditions.checkNotNull(view.getContext(),
"Unable to obtain a request manager for a view without a Context");
Activity activity = findActivity(view.getContext());
// The view might be somewhere else, like a service.
if (activity == null) {
return get(view.getContext().getApplicationContext());
}

// Support Fragments.
// Although the user might have non-support Fragments attached to FragmentActivity, searching
// for non-support Fragments is so expensive pre O and that should be rare enough that we
// prefer to just fall back to the Activity directly.
if (activity instanceof FragmentActivity) {
Fragment fragment = findSupportFragment(view, (FragmentActivity) activity);
return fragment != null ? get(fragment) : get(activity);
}

// Standard Fragments.
android.app.Fragment fragment = findFragment(view, activity);
if (fragment == null) {
return get(activity);
}
return get(fragment);
}

@NonNull
private RequestManager getApplicationManager(@NonNull Context context) {
// Either an application context or we're on a background thread.
if (applicationManager == null) {
synchronized (this) {
if (applicationManager == null) {
// Normally pause/resume is taken care of by the fragment we add to the fragment or
// activity. However, in this case since the manager attached to the application will not
// receive lifecycle events, we must force the manager to start resumed using
// ApplicationLifecycle.

// TODO(b/27524013): Factor out this Glide.get() call.
Glide glide = Glide.get(context.getApplicationContext());
applicationManager =
factory.build(
glide,
new ApplicationLifecycle(),
new EmptyRequestManagerTreeNode(),
context.getApplicationContext());
}
}
}

return applicationManager;
}

@NonNull
private RequestManager supportFragmentGet(
@NonNull Context context,
@NonNull FragmentManager fm,
@Nullable Fragment parentHint,
boolean isParentVisible) {
SupportRequestManagerFragment current =
getSupportRequestManagerFragment(fm, parentHint, isParentVisible);
RequestManager requestManager = current.getRequestManager();
if (requestManager == null) {
// TODO(b/27524013): Factor out this Glide.get() call.
Glide glide = Glide.get(context);
requestManager =
factory.build(
glide, current.getGlideLifecycle(), current.getRequestManagerTreeNode(), context);
current.setRequestManager(requestManager);
}
return requestManager;
}

@SuppressWarnings({"deprecation", "DeprecatedIsStillUsed"})
@Deprecated
@NonNull
private RequestManager fragmentGet(@NonNull Context context,
@NonNull android.app.FragmentManager fm,
@Nullable android.app.Fragment parentHint,
boolean isParentVisible) {
RequestManagerFragment current = getRequestManagerFragment(fm, parentHint, isParentVisible);
RequestManager requestManager = current.getRequestManager();
if (requestManager == null) {
// TODO(b/27524013): Factor out this Glide.get() call.
Glide glide = Glide.get(context);
requestManager =
factory.build(
glide, current.getGlideLifecycle(), current.getRequestManagerTreeNode(), context);
current.setRequestManager(requestManager);
}
return requestManager;
}
}

上面获取RequestManager对象的方法看着挺多,但是稍微归类一下还挺简单的。RequestManagerRetriever类中看似有很多个get()方法的重载,什么Context参数,Activity参数,Fragment参数等等,实际上只有两种情况而已,即传入Application类型的参数,和传入非Application类型的参数。

下面我们分析这两种情况:

  • 传入Application类型的参数:这种情况会在get(…)方法内部调用getApplicationManager(context)方法,得到RequestManager对象。因为Application的生命周期就是应用的生命周期,即Glide会和应用程序的生命周期同步,不会有其他的特殊处理。如果应用程序关闭,Glide的加载也会同时终止。
  • 传入Activity、FragmentActivity、v4包下的Fragment、app包下的Fragment:这种情况最终流程是一样的,都是在get(…)方法里调用fragmentGet(…)或者supportFragmentGet(…)获取RequestManager对象。而且在fragmentGet(…)和supportFragmentGet(…)分别调用了getRequestManagerFragment(fm, parentHint, isParentVisible)和getSupportRequestManagerFragment(fm, parentHint, isParentVisible)在当前的Activity中添加一个隐藏的Fragment。之所以添加Fragment,是因为当我们加载页面、关闭页面等跟生命周期相关的操作时,Glide必须感知到生命周期方法的调用,从而开始加载图片、停止加载图片等操作,即Glide需要监听页面的生命周期方法,但是不能让开发者在每个页面都写Glide跟生命周期相关的方法的代码。又因为Activity和Fragment的生命周期方法是同步的,所有在Activity中添加一个Fragment,专门来处理跟Glide相关的操作,这样开发者无需手动再写Glide和页面生命周期方法相关的代码。即Glide通过在页面中添加Fragment,帮我们处理了生命周期相关的代码。

    注意:在非Application参数的get(…)方法里有一个Util.isOnBackgroundThread()的判断,即在非主线程当中使用Glide,不管传入的是Activity或者Fragment,统统当做Application来处理。

    总结:Glide.with()方法主要是通过传入的参数来确定图片加载的生命周期,并且得到一个RequestManager对象。

  1. load()

    因为Glide.with()方法返回的是RequestManager对象,所以load()方法是在RequestManager类中。

    1
    2
    3
    4
    5
    6
    7
    8
    9
    10
    11
    12
    13
    14
    15
    16
    17
    18
    19
    20
    21
    22
    23
    24
    25
    26
    27
    28
    29
    30
    31
    32
    33
    34
    public class RequestManager implements LifecycleListener,ModelTypes<RequestBuilder<Drawable>>{
    @Override
    public RequestBuilder<Drawable> load(@Nullable String string) {
    return asDrawable().load(string);
    }

    public RequestBuilder<Drawable> asDrawable() {
    return as(Drawable.class);
    }

    @NonNull
    @CheckResult
    public <ResourceType> RequestBuilder<ResourceType> as(
    @NonNull Class<ResourceType> resourceClass) {
    //创建了一个RequestBuilder对象
    return new RequestBuilder<>(glide, this, resourceClass, context);
    }

    @NonNull
    @Override
    @CheckResult
    public RequestBuilder<TranscodeType> load(@Nullable String string) {
    return loadGeneric(string);
    }

    @NonNull
    private RequestBuilder<TranscodeType> loadGeneric(@Nullable Object model) {
    //model为设置的url
    this.model = model;
    //记录是否设置了url
    isModelSet = true;
    return this;
    }
    }

    load()方法主要是创建了一个RequestBuilder对象,并且给RequestBuilder设置了要加载的model(url),并记录url已设置的状态。

  2. into()

    1
    2
    3
    4
    5
    6
    7
    8
    9
    10
    11
    12
    13
    14
    15
    16
    17
    18
    19
    20
    21
    22
    23
    24
    25
    26
    27
    28
    29
    30
    31
    32
    33
    34
    35
    36
    37
    38
    39
    40
    41
    42
    43
    44
    45
    46
    47
    48
    49
    50
    51
    52
    53
    54
    55
    56
    57
    58
    59
    60
    61
    62
    63
    64
    65
    66
    67
    68
    69
    70
    71
    @NonNull
    public ViewTarget<ImageView, TranscodeType> into(@NonNull ImageView view) {
    Util.assertMainThread();
    Preconditions.checkNotNull(view);

    RequestOptions requestOptions = this.requestOptions;
    if (!requestOptions.isTransformationSet()
    && requestOptions.isTransformationAllowed()
    && view.getScaleType() != null) {
    // Clone in this method so that if we use this RequestBuilder to load into a View and then
    // into a different target, we don't retain the transformation applied based on the previous
    // View's scale type.

    // 这个RequestOptions里保存了要设置的scaleType
    switch (view.getScaleType()) {
    case CENTER_CROP:
    requestOptions = requestOptions.clone().optionalCenterCrop();
    break;
    case CENTER_INSIDE:
    requestOptions = requestOptions.clone().optionalCenterInside();
    break;
    case FIT_CENTER:
    case FIT_START:
    case FIT_END:
    requestOptions = requestOptions.clone().optionalFitCenter();
    break;
    case FIT_XY:
    requestOptions = requestOptions.clone().optionalCenterInside();
    break;
    case CENTER:
    case MATRIX:
    default:
    // Do nothing.
    }
    }

    //这个transcodeClass是指的drawable或bitmap
    //分析1
    return into(
    glideContext.buildImageViewTarget(view, transcodeClass),
    /*targetListener=*/ null,
    requestOptions);
    }

    @NonNull
    public <X> ViewTarget<ImageView, X> buildImageViewTarget(
    @NonNull ImageView imageView, @NonNull Class<X> transcodeClass) {
    return imageViewTargetFactory.buildTarget(imageView, transcodeClass);
    }

    /**
    * A factory responsible for producing the correct type of
    * {@link com.bumptech.glide.request.target.Target} for a given {@link android.view.View} subclass.
    */
    public class ImageViewTargetFactory {
    @NonNull
    @SuppressWarnings("unchecked")
    public <Z> ViewTarget<ImageView, Z> buildTarget(@NonNull ImageView view,
    @NonNull Class<Z> clazz) {
    //如果你在使用Glide加载图片的时候调用了asBitmap()方法,那么这里就会构建出BitmapImageViewTarget对象
    if (Bitmap.class.equals(clazz)) {
    return (ViewTarget<ImageView, Z>) new BitmapImageViewTarget(view);
    } else if (Drawable.class.isAssignableFrom(clazz)) {
    //至于DrawableImageViewTarget对象,这个通常都是用不到的,我们可以暂时不用管它。
    return (ViewTarget<ImageView, Z>) new DrawableImageViewTarget(view);
    } else {
    throw new IllegalArgumentException(
    "Unhandled class: " + clazz + ", try .as*(Class).transcode(ResourceTranscoder)");
    }
    }
    }

    上述代码在into()方法中通过buildImageViewTarget(view, transcodeClass)构建了一个ViewTarget对象,然后在into()方法的最后一行,又是一个into()方法,并且把ViewTarget这个对象当做参数,传入到了RequestBuilder中另一个接收Target对象的into()方法当中了。

    下面看一下这个into()方法。

    1
    2
    3
    4
    5
    6
    7
    8
    9
    10
    11
    12
    13
    14
    15
    16
    17
    18
    19
    20
    21
    22
    23
    24
    25
    26
    27
    28
    29
    30
    31
    32
    33
    34
    35
    36
    37
    38
    private <Y extends Target<TranscodeType>> Y into(
    @NonNull Y target,
    @Nullable RequestListener<TranscodeType> targetListener,
    @NonNull RequestOptions options) {
    Util.assertMainThread();
    Preconditions.checkNotNull(target);
    if (!isModelSet) {
    throw new IllegalArgumentException("You must call #load() before calling #into()");
    }

    options = options.autoClone();
    //分析1:构建一个Request对象,用来加载图片请求。
    Request request = buildRequest(target, targetListener, options);

    Request previous = target.getRequest();
    if (request.isEquivalentTo(previous)
    && !isSkipMemoryCacheWithCompletePreviousRequest(options, previous)) {
    request.recycle();
    // If the request is completed, beginning again will ensure the result is re-delivered,
    // triggering RequestListeners and Targets. If the request is failed, beginning again will
    // restart the request, giving it another chance to complete. If the request is already
    // running, we can let it continue running without interruption.
    if (!Preconditions.checkNotNull(previous).isRunning()) {
    // Use the previous request rather than the new one to allow for optimizations like skipping
    // setting placeholders, tracking and un-tracking Targets, and obtaining View dimensions
    // that are done in the individual Request.
    previous.begin();
    }
    return target;
    }

    requestManager.clear(target);
    target.setRequest(request);
    //分析2:发起请求
    requestManager.track(target, request);

    return target;
    }

    分析1:先来看buildRequest()方法是如何构建Request对象的。

    1
    2
    3
    4
    5
    6
    7
    8
    9
    10
    11
    12
    13
    14
    15
    16
    17
    18
    19
    20
    21
    22
    23
    24
    25
    26
    27
    28
    29
    30
    31
    32
    33
    34
    35
    36
    37
    38
    39
    40
    41
    42
    43
    44
    45
    46
    47
    48
    49
    50
    51
    52
    53
    54
    55
    56
    57
    58
    59
    60
    61
    62
    63
    64
    65
    66
    67
    68
    69
    70
    private Request buildRequest(
    Target<TranscodeType> target,
    @Nullable RequestListener<TranscodeType> targetListener,
    RequestOptions requestOptions) {
    return buildRequestRecursive(
    target,
    targetListener,
    /*parentCoordinator=*/ null,
    transitionOptions,
    requestOptions.getPriority(),
    requestOptions.getOverrideWidth(),
    requestOptions.getOverrideHeight(),
    requestOptions);
    }

    private Request buildRequestRecursive(
    Target<TranscodeType> target,
    @Nullable RequestListener<TranscodeType> targetListener,
    @Nullable RequestCoordinator parentCoordinator,
    TransitionOptions<?, ? super TranscodeType> transitionOptions,
    Priority priority,
    int overrideWidth,
    int overrideHeight,
    RequestOptions requestOptions) {

    // Build the ErrorRequestCoordinator first if necessary so we can update parentCoordinator.
    ErrorRequestCoordinator errorRequestCoordinator = null;
    if (errorBuilder != null) {
    //创建errorRequestCoordinator(异常处理对象)
    errorRequestCoordinator = new ErrorRequestCoordinator(parentCoordinator);
    parentCoordinator = errorRequestCoordinator;
    }

    //递归建立缩略图请求
    Request mainRequest =
    //分析1:
    buildThumbnailRequestRecursive(
    target,
    targetListener,
    parentCoordinator,
    transitionOptions,
    priority,
    overrideWidth,
    overrideHeight,
    requestOptions);

    if (errorRequestCoordinator == null) {
    return mainRequest;
    }

    int errorOverrideWidth = errorBuilder.requestOptions.getOverrideWidth();
    int errorOverrideHeight = errorBuilder.requestOptions.getOverrideHeight();
    if (Util.isValidDimensions(overrideWidth, overrideHeight)
    && !errorBuilder.requestOptions.isValidOverride()) {
    errorOverrideWidth = requestOptions.getOverrideWidth();
    errorOverrideHeight = requestOptions.getOverrideHeight();
    }

    Request errorRequest = errorBuilder.buildRequestRecursive(
    target,
    targetListener,
    errorRequestCoordinator,
    errorBuilder.transitionOptions,
    errorBuilder.requestOptions.getPriority(),
    errorOverrideWidth,
    errorOverrideHeight,
    errorBuilder.requestOptions);
    errorRequestCoordinator.setRequests(mainRequest, errorRequest);
    return errorRequestCoordinator;
    }

    分析1: buildThumbnailRequestRecursive()

    1
    2
    3
    4
    5
    6
    7
    8
    9
    10
    11
    12
    13
    14
    15
    16
    17
    18
    19
    20
    21
    22
    23
    24
    25
    26
    27
    28
    29
    30
    31
    32
    33
    34
    35
    36
    37
    38
    39
    40
    41
    42
    43
    44
    45
    46
    47
    48
    49
    50
    51
    52
    53
    54
    55
    56
    57
    58
    59
    60
    61
    62
    63
    64
    65
    66
    67
    68
    69
    70
    71
    72
    73
    74
    75
    76
    77
    78
    79
    80
    81
    82
    83
    84
    85
    86
    87
    88
    89
    90
    91
    92
    93
    94
    95
    96
    97
    98
    99
    100
    101
    102
    103
    104
    105
    106
    107
    108
    109
    110
    111
    112
    113
    114
    115
    116
    117
    118
    119
    120
    121
    122
    123
    124
    125
    126
    127
    128
    129
    130
    131
    132
    133
    134
    135
    136
    137
    private Request buildThumbnailRequestRecursive(
    Target<TranscodeType> target,
    RequestListener<TranscodeType> targetListener,
    @Nullable RequestCoordinator parentCoordinator,
    TransitionOptions<?, ? super TranscodeType> transitionOptions,
    Priority priority,
    int overrideWidth,
    int overrideHeight,
    RequestOptions requestOptions) {
    if (thumbnailBuilder != null) {
    // Recursive case: contains a potentially recursive thumbnail request builder.
    if (isThumbnailBuilt) {
    throw new IllegalStateException("You cannot use a request as both the main request and a "
    + "thumbnail, consider using clone() on the request(s) passed to thumbnail()");
    }

    TransitionOptions<?, ? super TranscodeType> thumbTransitionOptions =
    thumbnailBuilder.transitionOptions;

    // Apply our transition by default to thumbnail requests but avoid overriding custom options
    // that may have been applied on the thumbnail request explicitly.
    if (thumbnailBuilder.isDefaultTransitionOptionsSet) {
    thumbTransitionOptions = transitionOptions;
    }

    Priority thumbPriority = thumbnailBuilder.requestOptions.isPrioritySet()
    ? thumbnailBuilder.requestOptions.getPriority() : getThumbnailPriority(priority);

    int thumbOverrideWidth = thumbnailBuilder.requestOptions.getOverrideWidth();
    int thumbOverrideHeight = thumbnailBuilder.requestOptions.getOverrideHeight();
    if (Util.isValidDimensions(overrideWidth, overrideHeight)
    && !thumbnailBuilder.requestOptions.isValidOverride()) {
    thumbOverrideWidth = requestOptions.getOverrideWidth();
    thumbOverrideHeight = requestOptions.getOverrideHeight();
    }

    //coordinator是一个协调器,用于协调两个单独的{@link Request}同时加载图像的缩略图和图像的完整尺寸图。
    ThumbnailRequestCoordinator coordinator = new ThumbnailRequestCoordinator(parentCoordinator);
    //获取一个正常请求对象
    Request fullRequest =
    obtainRequest(
    target,
    targetListener,
    requestOptions,
    coordinator,
    transitionOptions,
    priority,
    overrideWidth,
    overrideHeight);
    isThumbnailBuilt = true;
    // Recursively generate thumbnail requests.
    //递归建议一个缩略图请求对象
    Request thumbRequest =
    thumbnailBuilder.buildRequestRecursive(
    target,
    targetListener,
    coordinator,
    thumbTransitionOptions,
    thumbPriority,
    thumbOverrideWidth,
    thumbOverrideHeight,
    thumbnailBuilder.requestOptions);
    isThumbnailBuilt = false;
    // 能够同时加载缩略图和正常的图的请求
    coordinator.setRequests(fullRequest, thumbRequest);
    return coordinator;
    } else if (thumbSizeMultiplier != null) {
    // Base case: thumbnail multiplier generates a thumbnail request, but cannot recurse.
    // 当设置了缩略的比例thumbSizeMultiplier(0 ~ 1)时,
    // 不需要递归建立缩略图请求
    ThumbnailRequestCoordinator coordinator = new ThumbnailRequestCoordinator(parentCoordinator);
    Request fullRequest =
    obtainRequest(
    target,
    targetListener,
    requestOptions,
    coordinator,
    transitionOptions,
    priority,
    overrideWidth,
    overrideHeight);
    RequestOptions thumbnailOptions = requestOptions.clone()
    .sizeMultiplier(thumbSizeMultiplier);

    Request thumbnailRequest =
    obtainRequest(
    target,
    targetListener,
    thumbnailOptions,
    coordinator,
    transitionOptions,
    getThumbnailPriority(priority),
    overrideWidth,
    overrideHeight);

    coordinator.setRequests(fullRequest, thumbnailRequest);
    return coordinator;
    } else {
    // Base case: no thumbnail.
    // 没有缩略图请求时,直接获取一个正常图请求
    return obtainRequest(
    target,
    targetListener,
    requestOptions,
    parentCoordinator,
    transitionOptions,
    priority,
    overrideWidth,
    overrideHeight);
    }

    private Request obtainRequest(
    Target<TranscodeType> target,
    RequestListener<TranscodeType> targetListener,
    RequestOptions requestOptions,
    RequestCoordinator requestCoordinator,
    TransitionOptions<?, ? super TranscodeType> transitionOptions,
    Priority priority,
    int overrideWidth,
    int overrideHeight) {
    return SingleRequest.obtain(
    context,
    glideContext,
    model,
    transcodeClass,
    requestOptions,
    overrideWidth,
    overrideHeight,
    priority,
    target,
    targetListener,
    requestListeners,
    requestCoordinator,
    glideContext.getEngine(),
    transitionOptions.getTransitionFactory());
    }
    }

    buildRequest()–>buildRequestRecursive()–> buildThumbnailRequestRecursive()

    这个过程里大部分是处理缩略图的,我们主要看一下最后一行的obtainRequest(…)方法,这个方法需要很多参数,比如requestOptions这个参数里有我们设置的placeholderId。diskCacheStrategy等等。

    以上into()方法总的过程就是在buildRequest()方法里建立了请求,且最多可同时进行缩略图和正常图的请求,into()方法的最后,调用了requestManager.track(target, request)方法。

    接着看看RequestManager.track(target, request)里面做了什么。

    1
    2
    3
    4
    5
    void track(@NonNull Target<?> target, @NonNull Request request) {
    // 加入一个target目标集合(Set)
    targetTracker.track(target);
    requestTracker.runRequest(request);
    }

    RequestTracker.runRequest(@NonNull Request request)

    这里有一个简单的逻辑判断,就是先判断Glide当前是不是处理暂停状态,如果不是暂停状态就调用Request的begin()方法来执行Request;否则的话就先清空请求,将Request添加到待执行的延迟请求队列里面,等暂停状态解除了之后再执行。

    1
    2
    3
    4
    5
    6
    7
    8
    9
    10
    11
    12
    13
    14
    15
    16
    17
    /**
    * Starts tracking the given request.
    */
    public void runRequest(@NonNull Request request) {
    requests.add(request);
    if (!isPaused) {
    //如果不是暂停状态,则开始请求
    request.begin();
    } else {
    request.clear();
    if (Log.isLoggable(TAG, Log.VERBOSE)) {
    Log.v(TAG, "Paused, delaying request");
    }

    pendingRequests.add(request);
    }
    }

    接下来再看SingleRequest.begin()方法

    1
    2
    3
    4
    5
    6
    7
    8
    9
    10
    11
    12
    13
    14
    15
    16
    17
    18
    19
    20
    21
    22
    23
    24
    25
    26
    27
    28
    29
    30
    31
    32
    33
    34
    35
    36
    37
    38
    39
    40
    41
    42
    43
    44
    45
    46
    47
    48
    49
    @Override
    public void begin() {
    assertNotCallingCallbacks();
    stateVerifier.throwIfRecycled();
    startTime = LogTime.getLogTime();
    //model(url)为空,则回调加载失败
    if (model == null) {
    ...
    onLoadFailed(new GlideException("Received null model"), logLevel);
    return;
    }

    if (status == Status.RUNNING) {
    throw new IllegalArgumentException("Cannot restart a running request");
    }

    // If we're restarted after we're complete (usually via something like a notifyDataSetChanged
    // that starts an identical request into the same Target or View), we can simply use the
    // resource and size we retrieved the last time around and skip obtaining a new size, starting a
    // new load etc. This does mean that users who want to restart a load because they expect that
    // the view size has changed will need to explicitly clear the View or Target before starting
    // the new load.
    if (status == Status.COMPLETE) {
    onResourceReady(resource, DataSource.MEMORY_CACHE);
    return;
    }

    // Restarts for requests that are neither complete nor running can be treated as new requests
    // and can run again from the beginning.

    status = Status.WAITING_FOR_SIZE;
    if (Util.isValidDimensions(overrideWidth, overrideHeight)) {
    //当调用RequestOptions.override(int width, int height)设置图片为固定的宽高时,直接执行下面的onSizeReady。
    //并且真正的请求就在onSizeReady方法里
    onSizeReady(overrideWidth, overrideHeight);
    } else {
    // 根据imageView的宽高算出图片的宽高,这个方法最终也会调用onSizeReady
    target.getSize(this);
    }

    if ((status == Status.RUNNING || status == Status.WAITING_FOR_SIZE)
    && canNotifyStatusChanged()) {
    //预先加载设置的缩略图
    target.onLoadStarted(getPlaceholderDrawable());
    }
    if (IS_VERBOSE_LOGGABLE) {
    logV("finished run method in " + LogTime.getElapsedMillis(startTime));
    }
    }

    RequestTracker.runRequest(…) -> SingleRequest.begin() -> onSizeReady()至此开始了真正的请求。

接下来看SingleRequest.onSizeReady(…)方法

1
2
3
4
5
6
7
8
9
10
11
12
13
14
15
16
17
18
19
20
21
22
23
24
25
26
27
28
29
30
31
32
33
34
35
36
37
38
39
40
41
42
43
44
/**
* A callback method that should never be invoked directly.
*/
@Override
public void onSizeReady(int width, int height) {
stateVerifier.throwIfRecycled();
if (IS_VERBOSE_LOGGABLE) {
logV("Got onSizeReady in " + LogTime.getElapsedMillis(startTime));
}
if (status != Status.WAITING_FOR_SIZE) {
return;
}
status = Status.RUNNING;

float sizeMultiplier = requestOptions.getSizeMultiplier();
this.width = maybeApplySizeMultiplier(width, sizeMultiplier);
this.height = maybeApplySizeMultiplier(height, sizeMultiplier);

if (IS_VERBOSE_LOGGABLE) {
logV("finished setup for calling load in " + LogTime.getElapsedMillis(startTime));
}
// 根据给定的配置进行加载,engine是一个负责加载、管理活跃和缓存资源的引擎类
loadStatus = engine.load(
glideContext,
model,
requestOptions.getSignature(),
this.width,
this.height,
requestOptions.getResourceClass(),
transcodeClass,
priority,
requestOptions.getDiskCacheStrategy(),
requestOptions.getTransformations(),
requestOptions.isTransformationRequired(),
requestOptions.isScaleOnlyOrNoTransform(),
requestOptions.getOptions(),
requestOptions.isMemoryCacheable(),
requestOptions.getUseUnlimitedSourceGeneratorsPool(),
requestOptions.getUseAnimationPool(),
requestOptions.getOnlyRetrieveFromCache(),
this);

...
}

该方法内部调用engine.load()开始了真正的请求。

下面看Engine.load()方法

这里说一点前置的知识点,Glide的缓存有内存、磁盘、网络三级;内存缓存又可以分为活动缓存、内存缓存两级。

Glide之内存缓存(LRU算法):

  • 活动缓存:给正在使用的资源存储的,弱引用。
  • 内存缓存:为第二次缓存服务,LRU算法。
  • LRU算法:最近没有使用的元素,会自动被移除掉
  • LruCache v4:利用LinkedHashMap<K, V>,LinkedHashMap: true==拥有访问排序的功能 (最少使用元素算法-LRU算法)
**Glide之磁盘缓存** 
  • 保存时长比较长:保存在本地磁盘 文件的形式存储 (不再是保存在运行内存中,而是磁盘中)
  • LRU算法: 最近没有使用的元素,会自动被移除掉
  • LruCahce – Android中提供了 V4
  • DiskLruCache — Android中没有提供了 –> DiskLruCache
  • DiskLruCache:回收方式:LRU算法, 访问排序
  • DiskLruCache: 面向磁盘文件保存

    1
    2
    3
    4
    5
    6
    7
    8
    9
    10
    11
    12
    13
    14
    15
    16
    17
    18
    19
    20
    21
    22
    23
    24
    25
    26
    27
    28
    29
    30
    31
    32
    33
    34
    35
    36
    37
    38
    39
    40
    41
    42
    43
    44
    45
    46
    47
    48
    49
    50
    51
    52
    53
    54
    55
    56
    57
    58
    59
    60
    61
    62
    63
    64
    65
    66
    67
    68
    69
    70
    71
    72
    73
    74
    75
    76
    77
    78
    79
    80
    81
    82
    83
    84
    85
    86
    87
    88
    89
    90
    91
    92
    93
    94
    95
    public class Engine implements EngineJobListener,MemoryCache.ResourceRemovedListener,
    EngineResource.ResourceListener {
    public <R> LoadStatus load(
    GlideContext glideContext,
    Object model,
    Key signature,
    int width,
    int height,
    Class<?> resourceClass,
    Class<R> transcodeClass,
    Priority priority,
    DiskCacheStrategy diskCacheStrategy,
    Map<Class<?>, Transformation<?>> transformations,
    boolean isTransformationRequired,
    boolean isScaleOnlyOrNoTransform,
    Options options,
    boolean isMemoryCacheable,
    boolean useUnlimitedSourceExecutorPool,
    boolean useAnimationPool,
    boolean onlyRetrieveFromCache,
    ResourceCallback cb) {
    Util.assertMainThread();
    long startTime = VERBOSE_IS_LOGGABLE ? LogTime.getLogTime() : 0;

    EngineKey key = keyFactory.buildKey(model, signature, width, height, transformations,
    resourceClass, transcodeClass, options);
    //1. 先获取活动缓存,如果有的话,回调onResourceReady(...)并返回。
    EngineResource<?> active = loadFromActiveResources(key, isMemoryCacheable);
    if (active != null) {
    cb.onResourceReady(active, DataSource.MEMORY_CACHE);
    if (VERBOSE_IS_LOGGABLE) {
    logWithTimeAndKey("Loaded resource from active resources", startTime, key);
    }
    return null;
    }
    //2. 如果没有活动缓存,再从内存中找,如果有的话, put到Map<Key, ResourceWeakReference> (内部维护的弱引用缓存map)
    //并且回调 onResourceReady(...)并返回。
    EngineResource<?> cached = loadFromCache(key, isMemoryCacheable);
    if (cached != null) {
    cb.onResourceReady(cached, DataSource.MEMORY_CACHE);
    if (VERBOSE_IS_LOGGABLE) {
    logWithTimeAndKey("Loaded resource from cache", startTime, key);
    }
    return null;
    }

    EngineJob<?> current = jobs.get(key, onlyRetrieveFromCache);
    if (current != null) {
    current.addCallback(cb);
    if (VERBOSE_IS_LOGGABLE) {
    logWithTimeAndKey("Added to existing load", startTime, key);
    }
    return new LoadStatus(cb, current);
    }
    // 如果内存中没有,则创建engineJob(decodejob的回调类,管理下载过程以及状态)
    EngineJob<R> engineJob =
    engineJobFactory.build(
    key,
    isMemoryCacheable,
    useUnlimitedSourceExecutorPool,
    useAnimationPool,
    onlyRetrieveFromCache);
    // 创建解析工作对象
    DecodeJob<R> decodeJob =
    decodeJobFactory.build(
    glideContext,
    model,
    key,
    signature,
    width,
    height,
    resourceClass,
    transcodeClass,
    priority,
    diskCacheStrategy,
    transformations,
    isTransformationRequired,
    isScaleOnlyOrNoTransform,
    onlyRetrieveFromCache,
    options,
    engineJob);

    // 放在Jobs内部维护的HashMap中
    jobs.put(key, engineJob);
    // 注册ResourceCallback接口
    engineJob.addCallback(cb);
    // 内部开启线程去请求
    engineJob.start(decodeJob);

    if (VERBOSE_IS_LOGGABLE) {
    logWithTimeAndKey("Started new load", startTime, key);
    }
    return new LoadStatus(cb, engineJob);
    }
    }

    engineJob.start(decodeJob)方法

    1
    2
    3
    4
    5
    6
    7
    8
    9
    10
    11
    12
    13
    14
    class EngineJob<R> implements DecodeJob.Callback<R>,Poolable{
    public void start(DecodeJob<R> decodeJob) {
    this.decodeJob = decodeJob;
    //根据不同的情况返回下面四种不同的线程池
    //GlideExecutor diskCacheExecutor;
    //GlideExecutor sourceExecutor;
    //GlideExecutor sourceUnlimitedExecutor;
    //GlideExecutor animationExecutor;
    GlideExecutor executor = decodeJob.willDecodeFromCache()
    ? diskCacheExecutor
    : getActiveSourceExecutor();
    executor.execute(decodeJob);
    }
    }

    EngineJob是一个通过为图片的加载添加和移除callbacks来管理图片加载,并在加载完成后通知callbacks的类。

    它的主要作用就是用来开启线程的,为后面的异步加载图片做准备。DecodeJob对象,从名字上来看,它好像是用来对图片进行解码的,但实际上它的任务十分繁重,Engine.load()最后调用了EngineJob的start()方法来运行DecodeJob对象,这实际上就是让DecodeJob的run()方法在子线程当中执行了。

    DecodeJob.run()方法又调用了runWrapped(),我们来看runWrapped()方法。

    1
    2
    3
    4
    5
    6
    7
    8
    9
    10
    11
    12
    13
    14
    15
    16
    17
    18
    19
    20
    private void runWrapped() {
    switch (runReason) {
    case INITIALIZE:
    stage = getNextStage(Stage.INITIALIZE);
    //分析1:
    currentGenerator = getNextGenerator();
    //分析2:
    runGenerators();
    break;
    case SWITCH_TO_SOURCE_SERVICE:
    runGenerators();
    break;
    case DECODE_DATA:
    //分析3:
    decodeFromRetrievedData();
    break;
    default:
    throw new IllegalStateException("Unrecognized run reason: " + runReason);
    }
    }

    分析1:完整情况下,会异步依次生成这里的ResourceCacheGenerator、DataCacheGenerator和SourceGenerator对象,并在之后执行其中的startNext()

    1
    2
    3
    4
    5
    6
    7
    8
    9
    10
    11
    12
    13
    14
    private DataFetcherGenerator getNextGenerator() {
    switch (stage) {
    case RESOURCE_CACHE:
    return new ResourceCacheGenerator(decodeHelper, this);
    case DATA_CACHE:
    return new DataCacheGenerator(decodeHelper, this);
    case SOURCE:
    return new SourceGenerator(decodeHelper, this);
    case FINISHED:
    return null;
    default:
    throw new IllegalStateException("Unrecognized stage: " + stage);
    }
    }

    分析2: runGenerators()里面调用了startNext()。

    startNext()是接口类DataFetcherGenerator里的抽象方法,在SourceGenerator、DataCacheGenerator、ResourceCacheGenerator分别重写了startNext(),这三个类分别对应着图片的原始数据、缓存文件里原始未修改的数据、缓存文件里经过采样\变换的数据。

    下面我们看一下从网络加载图片时,也就是SourceGenerator.startNext()方法

    根据磁盘缓存策略,先将源数据写入磁盘,然后从缓存文件中加载而不是直接返回。

    1
    2
    3
    4
    5
    6
    7
    8
    9
    10
    11
    12
    13
    14
    15
    16
    17
    18
    19
    20
    21
    22
    23
    24
    25
    26
    27
    28
    29
    30
    31
    32
    33
    34
    35
    @Override
    public boolean startNext() {
    //dataToCache数据不为空的话缓存到硬盘
    if (dataToCache != null) {
    Object data = dataToCache;
    dataToCache = null;
    cacheData(data);
    }

    if (sourceCacheGenerator != null && sourceCacheGenerator.startNext()) {
    return true;
    }
    sourceCacheGenerator = null;

    loadData = null;
    boolean started = false;
    while (!started && hasNextModelLoader()) {
    //分析1:
    //getLoadData()方法内部会在modelLoaders里面找到ModelLoder对象
    // (每个Generator对应一个ModelLoader),
    // 并使用modelLoader.buildLoadData方法返回一个loadData列表
    loadData = helper.getLoadData().get(loadDataListIndex++);
    if (loadData != null
    && (helper.getDiskCacheStrategy().isDataCacheable(loadData.fetcher.getDataSource())
    || helper.hasLoadPath(loadData.fetcher.getDataClass()))) {
    started = true;

    //分析2
    //通过loadData对象的fetcher对象(其实现类为HttpUrlFetcher)的
    // loadData方法来获取图片数据
    loadData.fetcher.loadData(helper.getPriority(), this);
    }
    }
    return started;
    }

    分析1:

    1
    2
    3
    4
    5
    6
    7
    8
    9
    10
    11
    12
    13
    14
    15
    16
    17
    18
    19
    final class DecodeHelper<Transcode>{
    List<LoadData<?>> getLoadData() {
    if (!isLoadDataSet) {
    isLoadDataSet = true;
    loadData.clear();
    List<ModelLoader<Object, ?>> modelLoaders = glideContext.getRegistry().getModelLoaders(model);
    //noinspection ForLoopReplaceableByForEach to improve perf
    for (int i = 0, size = modelLoaders.size(); i < size; i++) {
    ModelLoader<Object, ?> modelLoader = modelLoaders.get(i);
    // 注意:这里最终是通过HttpGlideUrlLoader的buildLoadData获取到实际的loadData对象
    LoadData<?> current =modelLoader.buildLoadData(model, width, height, options);
    if (current != null) {
    loadData.add(current);
    }
    }
    }
    return loadData;
    }
    }

    HttpGlideUrlLoader.buildLoadData(…)

    1
    2
    3
    4
    5
    6
    7
    8
    9
    10
    11
    12
    13
    14
    15
    16
    17
    18
    19
    @Override
    public LoadData<InputStream> buildLoadData(@NonNull GlideUrl model, int width, int height,
    @NonNull Options options) {
    // GlideUrls memoize parsed URLs so caching them saves a few object instantiations and time
    // spent parsing urls.
    //GlideUrls会记住已解析的URL,因此对它们进行缓存可以节省一些对象实例化和解析URL所花费的时间。
    GlideUrl url = model;
    if (modelCache != null) {
    url = modelCache.get(model, 0, 0);
    if (url == null) {
    //分析1.1:
    modelCache.put(model, 0, 0, model);
    url = model;
    }
    }
    int timeout = options.get(TIMEOUT);
    //在这里创建了一个DataFetcher的实现类HttpUrlFetcher
    return new LoadData<>(url, new HttpUrlFetcher(url, timeout));
    }

    分析1.1:modelCache.put(…)

    1
    2
    3
    4
    5
    6
    7
    8
    9
    10
    11
    12
    13
    /**
    * Add a value.
    *
    * @param model The model.
    * @param width The width in pixels of the view the image is being loaded into.
    * @param height The height in pixels of the view the image is being loaded into.
    * @param value The value to store.
    */
    public void put(A model, int width, int height, B value) {
    ModelKey<A> key = ModelKey.get(model, width, height);
    // 最终是通过LruCache来缓存对应的值,key是一个ModelKey对象(由model、width、height三个属性组成)
    cache.put(key, value);
    }

    从这里的分析,我们明白了HttpUrlFetcher实际上就是最终的请求执行者,而且,我们知道了Glide会使用LruCache来对解析后的url来进行缓存,以便后续可以省去解析url的时间。

    分析2:HttpUrlFetcher.loadData(…)

    1
    2
    3
    4
    5
    6
    7
    8
    9
    10
    11
    12
    13
    14
    15
    16
    17
    18
    19
    20
    @Override
    public void loadData(@NonNull Priority priority,
    @NonNull DataCallback<? super InputStream> callback) {
    long startTime = LogTime.getLogTime();
    try {
    //分析1 loadDataWithRedirects内部是通过HttpURLConnection网络请求数据
    InputStream result = loadDataWithRedirects(glideUrl.toURL(), 0, null, glideUrl.getHeaders());
    // 请求成功回调onDataReady()
    callback.onDataReady(result);
    } catch (IOException e) {
    if (Log.isLoggable(TAG, Log.DEBUG)) {
    Log.d(TAG, "Failed to load data for url", e);
    }
    callback.onLoadFailed(e);
    } finally {
    if (Log.isLoggable(TAG, Log.VERBOSE)) {
    Log.v(TAG, "Finished http url fetcher fetch in " + LogTime.getElapsedMillis(startTime));
    }
    }
    }

    分析1:HttpUrlFetcher.loadDataWithRedirects(…)

    1
    2
    3
    4
    5
    6
    7
    8
    9
    10
    11
    12
    13
    14
    15
    16
    17
    18
    19
    20
    21
    22
    23
    24
    25
    26
    27
    28
    29
    30
    31
    32
    33
    34
    35
    36
    37
    38
    39
    40
    41
    42
    43
    44
    45
    46
    47
    48
    49
    50
    51
    52
    53
    54
    55
    56
    57
    58
    59
    60
    61
    62
    63
    64
    65
    66
    67
    68
    69
    70
    71
    72
    73
    private InputStream loadDataWithRedirects(URL url, int redirects, URL lastUrl,
    Map<String, String> headers) throws IOException {
    if (redirects >= MAXIMUM_REDIRECTS) {
    throw new HttpException("Too many (> " + MAXIMUM_REDIRECTS + ") redirects!");
    } else {
    // Comparing the URLs using .equals performs additional network I/O and is generally broken.
    // See http://michaelscharf.blogspot.com/2006/11/javaneturlequals-and-hashcode-make.html.
    try {
    if (lastUrl != null && url.toURI().equals(lastUrl.toURI())) {
    throw new HttpException("In re-direct loop");

    }
    } catch (URISyntaxException e) {
    // Do nothing, this is best effort.
    }
    }

    urlConnection = connectionFactory.build(url);
    for (Map.Entry<String, String> headerEntry : headers.entrySet()) {
    urlConnection.addRequestProperty(headerEntry.getKey(), headerEntry.getValue());
    }
    urlConnection.setConnectTimeout(timeout);
    urlConnection.setReadTimeout(timeout);
    urlConnection.setUseCaches(false);
    urlConnection.setDoInput(true);

    // Stop the urlConnection instance of HttpUrlConnection from following redirects so that
    // redirects will be handled by recursive calls to this method, loadDataWithRedirects.
    urlConnection.setInstanceFollowRedirects(false);

    // Connect explicitly to avoid errors in decoders if connection fails.
    urlConnection.connect();
    // Set the stream so that it's closed in cleanup to avoid resource leaks. See #2352.
    stream = urlConnection.getInputStream();
    if (isCancelled) {
    return null;
    }
    final int statusCode = urlConnection.getResponseCode();
    //2xx的状态码,代表请求成功
    if (isHttpOk(statusCode)) {
    //从urlConnection中获取资源流
    return getStreamForSuccessfulRequest(urlConnection);
    } else if (isHttpRedirect(statusCode)) {
    //重定向请求
    String redirectUrlString = urlConnection.getHeaderField("Location");
    if (TextUtils.isEmpty(redirectUrlString)) {
    throw new HttpException("Received empty or null redirect url");
    }
    URL redirectUrl = new URL(url, redirectUrlString);
    // Closing the stream specifically is required to avoid leaking ResponseBodys in addition
    // to disconnecting the url connection below. See #2352.
    cleanup();
    return loadDataWithRedirects(redirectUrl, redirects + 1, url, headers);
    } else if (statusCode == INVALID_STATUS_CODE) {
    throw new HttpException(statusCode);
    } else {
    throw new HttpException(urlConnection.getResponseMessage(), statusCode);
    }
    }

    private InputStream getStreamForSuccessfulRequest(HttpURLConnection urlConnection)
    throws IOException {
    if (TextUtils.isEmpty(urlConnection.getContentEncoding())) {
    int contentLength = urlConnection.getContentLength();
    stream = ContentLengthInputStream.obtain(urlConnection.getInputStream(), contentLength);
    } else {
    if (Log.isLoggable(TAG, Log.DEBUG)) {
    Log.d(TAG, "Got non empty content encoding: " + urlConnection.getContentEncoding());
    }
    stream = urlConnection.getInputStream();
    }
    return stream;
    }

    HttpUrlFetcher.loadData(…)方法主要是通过调用loadDataWithRedirects(…)方法,使用原生的HttpURLConnection进行网络请求后,调用getStreamForSuccessfulRequest()方法获取最终的图片流。

  1. 现在我们回到DecodeJob类中的run() ->runWrapped()

    下面我们再次贴出runWrapped()方法的代码

    1
    2
    3
    4
    5
    6
    7
    8
    9
    10
    11
    12
    13
    14
    15
    16
    17
    18
    private void runWrapped() {
    switch (runReason) {
    case INITIALIZE:
    stage = getNextStage(Stage.INITIALIZE);
    currentGenerator = getNextGenerator();
    runGenerators();
    break;
    case SWITCH_TO_SOURCE_SERVICE:
    runGenerators();
    break;
    case DECODE_DATA:
    // 分析1:
    decodeFromRetrievedData();
    break;
    default:
    throw new IllegalStateException("Unrecognized run reason: " + runReason);
    }
    }

    分析1:我们在刚才获取到图片的流后,还需要decodeFromRetrievedData()方法对流进行处理以得到我们想要的资源。

    1
    2
    3
    4
    5
    6
    7
    8
    9
    10
    11
    12
    13
    14
    15
    16
    17
    18
    19
    20
    21
    22
    23
    24
    25
    26
    27
    28
    29
    30
    31
    32
    33
    34
    35
    36
    37
    38
    39
    40
    41
    42
    43
    44
    45
    46
    47
    48
    49
    50
    51
    52
    53
    54
    55
    56
    57
    58
    59
    60
    61
    62
    63
    64
    65
    66
    67
    68
    69
    70
    class DecodeJob<R> implements DataFetcherGenerator.FetcherReadyCallback,
    Runnable,
    Comparable<DecodeJob<?>>,
    Poolable {
    private void decodeFromRetrievedData() {
    if (Log.isLoggable(TAG, Log.VERBOSE)) {
    logWithTimeAndKey("Retrieved data", startFetchTime,
    "data: " + currentData
    + ", cache key: " + currentSourceKey
    + ", fetcher: " + currentFetcher);
    }
    Resource<R> resource = null;
    try {
    //从数据中解码得到资源
    resource = decodeFromData(currentFetcher, currentData, currentDataSource);
    } catch (GlideException e) {
    e.setLoggingDetails(currentAttemptingKey, currentDataSource);
    throwables.add(e);
    }
    if (resource != null) {
    // 编码和发布最终得到的Resource<Bitmap>对象
    notifyEncodeAndRelease(resource, currentDataSource);
    } else {
    runGenerators();
    }
    }


    private <Data> Resource<R> decodeFromData(DataFetcher<?> fetcher, Data data,
    DataSource dataSource) throws GlideException {
    try {
    if (data == null) {
    return null;
    }
    long startTime = LogTime.getLogTime();
    //执行解码的方法
    Resource<R> result = decodeFromFetcher(data, dataSource);
    if (Log.isLoggable(TAG, Log.VERBOSE)) {
    logWithTimeAndKey("Decoded result " + result, startTime);
    }
    return result;
    } finally {
    fetcher.cleanup();
    }
    }

    @SuppressWarnings("unchecked")
    private <Data> Resource<R> decodeFromFetcher(Data data, DataSource dataSource)
    throws GlideException {
    LoadPath<Data, ?, R> path = decodeHelper.getLoadPath((Class<Data>) data.getClass());
    //将解码任务分发给LoadPath
    return runLoadPath(data, dataSource, path);
    }

    private <Data, ResourceType> Resource<R> runLoadPath(Data data, DataSource dataSource,
    LoadPath<Data, ResourceType, R> path) throws GlideException {
    Options options = getOptionsWithHardwareConfig(dataSource);
    // 将数据进一步包装
    DataRewinder<Data> rewinder = glideContext.getRegistry().getRewinder(data);
    try {
    // ResourceType in DecodeCallback below is required for compilation to work with gradle.
    //分析1:
    //将解码任务分发给LoadPath类里的load(...)方法
    return path.load(
    rewinder, options, width, height, new DecodeCallback<ResourceType>(dataSource));
    } finally {
    rewinder.cleanup();
    }
    }
    }

    分析1:LoadPath.load(…)

    1
    2
    3
    4
    5
    6
    7
    8
    9
    10
    11
    12
    13
    14
    15
    16
    17
    18
    19
    20
    21
    22
    23
    24
    25
    26
    27
    28
    29
    30
    31
    32
    33
    34
    35
    36
    37
    38
    39
    40
    public class LoadPath<Data, ResourceType, Transcode> {

    public Resource<Transcode> load(DataRewinder<Data> rewinder, @NonNull Options options, int width,
    int height, DecodePath.DecodeCallback<ResourceType> decodeCallback) throws GlideException {
    List<Throwable> throwables = Preconditions.checkNotNull(listPool.acquire());
    try {
    //分析2:
    return loadWithExceptionList(rewinder, options, width, height, decodeCallback, throwables);
    } finally {
    listPool.release(throwables);
    }
    }

    private Resource<Transcode> loadWithExceptionList(DataRewinder<Data> rewinder,
    @NonNull Options options,
    int width, int height, DecodePath.DecodeCallback<ResourceType> decodeCallback,
    List<Throwable> exceptions) throws GlideException {
    Resource<Transcode> result = null;
    //noinspection ForLoopReplaceableByForEach to improve perf
    for (int i = 0, size = decodePaths.size(); i < size; i++) {
    DecodePath<Data, ResourceType, Transcode> path = decodePaths.get(i);
    try {
    //分析3
    //将解码任务又进一步分发给DecodePath的decode方法去解码
    result = path.decode(rewinder, width, height, options, decodeCallback);
    } catch (GlideException e) {
    exceptions.add(e);
    }
    if (result != null) {
    break;
    }
    }

    if (result == null) {
    throw new GlideException(failureMessage, new ArrayList<>(exceptions));
    }

    return result;
    }
    }

    分析3:DecodePath.decode(…)

    1
    2
    3
    4
    5
    6
    7
    8
    9
    10
    11
    12
    13
    14
    15
    16
    17
    18
    19
    20
    21
    22
    23
    24
    25
    26
    27
    28
    29
    30
    31
    32
    33
    34
    35
    36
    37
    38
    39
    40
    41
    42
    43
    44
    45
    46
    47
    48
    49
    50
    51
    52
    53
    54
    55
    56
    public class DecodePath<DataType, ResourceType, Transcode> {
    public Resource<Transcode> decode(DataRewinder<DataType> rewinder, int width, int height,
    @NonNull Options options, DecodeCallback<ResourceType> callback) throws GlideException {

    //继续调用DecodePath的decodeResource方法去解析出数据
    Resource<ResourceType> decoded = decodeResource(rewinder, width, height, options);
    Resource<ResourceType> transformed = callback.onResourceDecoded(decoded);
    return transcoder.transcode(transformed, options);
    }

    @NonNull
    private Resource<ResourceType> decodeResource(DataRewinder<DataType> rewinder, int width,
    int height, @NonNull Options options) throws GlideException {
    List<Throwable> exceptions = Preconditions.checkNotNull(listPool.acquire());
    try {
    //分析4:
    return decodeResourceWithList(rewinder, width, height, options, exceptions);
    } finally {
    listPool.release(exceptions);
    }
    }

    private Resource<ResourceType> decodeResourceWithList(DataRewinder<DataType> rewinder, int width,
    int height, @NonNull Options options, List<Throwable> exceptions) throws GlideException {
    Resource<ResourceType> result = null;
    //noinspection ForLoopReplaceableByForEach to improve perf
    for (int i = 0, size = decoders.size(); i < size; i++) {
    ResourceDecoder<DataType, ResourceType> decoder = decoders.get(i);
    try {
    DataType data = rewinder.rewindAndGet();
    if (decoder.handles(data, options)) {
    //获取包装的数据
    data = rewinder.rewindAndGet();
    // 根据data(DataType)和ResourceType的类型分发给不同的解码器Decoder
    result = decoder.decode(data, width, height, options);
    }
    // Some decoders throw unexpectedly. If they do, we shouldn't fail the entire load path, but
    // instead log and continue. See #2406 for an example.
    } catch (IOException | RuntimeException | OutOfMemoryError e) {
    if (Log.isLoggable(TAG, Log.VERBOSE)) {
    Log.v(TAG, "Failed to decode data for " + decoder, e);
    }
    exceptions.add(e);
    }

    if (result != null) {
    break;
    }
    }

    if (result == null) {
    throw new GlideException(failureMessage, new ArrayList<>(exceptions));
    }
    return result;
    }
    }

    可以看到,经过一连串的嵌套调用,最终执行到了decoder.decode()这行代码,decode是一个ResourceDecoder<DataType, ResourceType>资源解码器接口,根据不同的DataType和ResourceType它会有不同的实现类,这里的实现类是ByteBufferBitmapDecoder,接下来让我们来看看这个解码器内部的解码流程。

    ByteBufferBitmapDecoder.decode(…)

    1
    2
    3
    4
    5
    6
    7
    8
    9
    10
    11
    12
    13
    14
    15
    /**
    * Decodes {@link android.graphics.Bitmap Bitmaps} from {@link java.nio.ByteBuffer ByteBuffers}.
    */
    public class ByteBufferBitmapDecoder implements ResourceDecoder<ByteBuffer, Bitmap> {
    private final Downsampler downsampler;

    @Override
    public Resource<Bitmap> decode(@NonNull ByteBuffer source, int width, int height,
    @NonNull Options options)
    throws IOException {
    InputStream is = ByteBufferUtil.toStream(source);
    //核心代码
    return downsampler.decode(is, width, height, options);
    }
    }

    可以看到,最终是使用了一个downsampler,它是一个压缩器,主要是对流进行解码,压缩,圆角等处理。

1
2
3
4
5
6
7
8
9
10
11
12
13
14
15
16
17
18
19
20
21
22
23
24
25
26
27
28
29
30
31
32
33
34
35
36
37
38
39
40
41
42
43
44
45
46
47
48
49
50
51
52
53
54
55
56
57
58
59
60
61
62
63
64
65
66
67
68
69
70
71
72
73
public final class Downsampler {
public Resource<Bitmap> decode(InputStream is, int outWidth, int outHeight,
Options options) throws IOException {
return decode(is, outWidth, outHeight, options, EMPTY_CALLBACKS);
}

//根据给定的is解码成Bitmap
public Resource<Bitmap> decode(InputStream is, int requestedWidth, int requestedHeight,
Options options, DecodeCallbacks callbacks) throws IOException {
Preconditions.checkArgument(is.markSupported(), "You must provide an InputStream that supports"
+ " mark()");

byte[] bytesForOptions = byteArrayPool.get(ArrayPool.STANDARD_BUFFER_SIZE_BYTES, byte[].class);
BitmapFactory.Options bitmapFactoryOptions = getDefaultOptions();
bitmapFactoryOptions.inTempStorage = bytesForOptions;

DecodeFormat decodeFormat = options.get(DECODE_FORMAT);
DownsampleStrategy downsampleStrategy = options.get(DownsampleStrategy.OPTION);
boolean fixBitmapToRequestedDimensions = options.get(FIX_BITMAP_SIZE_TO_REQUESTED_DIMENSIONS);
boolean isHardwareConfigAllowed =
options.get(ALLOW_HARDWARE_CONFIG) != null && options.get(ALLOW_HARDWARE_CONFIG);
//核心代码
try {
Bitmap result = decodeFromWrappedStreams(is, bitmapFactoryOptions,
downsampleStrategy, decodeFormat, isHardwareConfigAllowed, requestedWidth,
requestedHeight, fixBitmapToRequestedDimensions, callbacks);
//将Bitmap包装成BitmapResource
return BitmapResource.obtain(result, bitmapPool);
} finally {
releaseOptions(bitmapFactoryOptions);
byteArrayPool.put(bytesForOptions);
}
}

private Bitmap decodeFromWrappedStreams(InputStream is,
BitmapFactory.Options options, DownsampleStrategy downsampleStrategy,
DecodeFormat decodeFormat, boolean isHardwareConfigAllowed, int requestedWidth,
int requestedHeight, boolean fixBitmapToRequestedDimensions,
DecodeCallbacks callbacks) throws IOException {

//省略计算压缩比例等操作
...

Bitmap downsampled = decodeStream(is, options, callbacks, bitmapPool);
callbacks.onDecodeComplete(bitmapPool, downsampled);

//Bitmap旋转处理
...
return rotated;
}

private static Bitmap decodeStream(InputStream is, BitmapFactory.Options options,
DecodeCallbacks callbacks, BitmapPool bitmapPool) throws IOException {

...
final Bitmap result;
TransformationUtils.getBitmapDrawableLock().lock();
try {
//核心代码
result = BitmapFactory.decodeStream(is, null, options);
} catch (IllegalArgumentException e) {
...
} finally {
TransformationUtils.getBitmapDrawableLock().unlock();
}

if (options.inJustDecodeBounds) {
is.reset();

}
return result;
}
}

从以上源码流程我们知道,最后是在DownSampler的decodeStream()方法中使用了BitmapFactory.decodeStream()来得到Bitmap对象。然后,我们来分析下图片时如何显示的,我们回到DownSampler.decode()方法,看到关注点7,这里是将Bitmap包装成BitmapResource对象返回,通过内部的get方法可以得到Bitmap对象,再回到DecodeJob.run()方法,这是使用了notifyEncodeAndRelease()方法对Resource对象进行了发布。

我们再回到上面分析的HttpUrlFetcher.loadData(…)方法

1
2
3
4
5
6
7
8
9
10
11
12
13
14
15
16
17
18
19
20
@Override
public void loadData(@NonNull Priority priority,
@NonNull DataCallback<? super InputStream> callback) {
long startTime = LogTime.getLogTime();
try {
//loadDataWithRedirects内部是通过HttpURLConnection网络请求数据
InputStream result = loadDataWithRedirects(glideUrl.toURL(), 0, null, glideUrl.getHeaders());
// 分析1:请求成功回调onDataReady()
callback.onDataReady(result);
} catch (IOException e) {
if (Log.isLoggable(TAG, Log.DEBUG)) {
Log.d(TAG, "Failed to load data for url", e);
}
callback.onLoadFailed(e);
} finally {
if (Log.isLoggable(TAG, Log.VERBOSE)) {
Log.v(TAG, "Finished http url fetcher fetch in " + LogTime.getElapsedMillis(startTime));
}
}
}

分析1: onDataReady(result)

1
2
3
4
5
6
7
8
9
10
11
12
13
14
15
16
17
18
19
class SourceGenerator implements DataFetcherGenerator,
DataFetcher.DataCallback<Object>,
DataFetcherGenerator.FetcherReadyCallback {

@Override
public void onDataReady(Object data) {
DiskCacheStrategy diskCacheStrategy = helper.getDiskCacheStrategy();
if (data != null && diskCacheStrategy.isDataCacheable(loadData.fetcher.getDataSource())) {
dataToCache = data;
// We might be being called back on someone else's thread. Before doing anything, we should
// reschedule to get back onto Glide's thread.
cb.reschedule();
} else {
// 分析2:通知回调加载已完成
cb.onDataFetcherReady(loadData.sourceKey, data, loadData.fetcher,
loadData.fetcher.getDataSource(), originalKey);
}
}
}

​

分析2:**onDataFetcherReady(...)**
1
2
3
4
5
6
7
8
9
10
11
12
13
14
15
16
17
18
19
20
21
22
23
24
25
26
27
28
29
30
31
32
33
34
35
36
37
38
39
40
41
42
43
44
45
46
47
48
49
50
51
52
53
54
55
56
57
58
59
60
61
62
63
64
65
66
67
68
69
70
71
72
73
74
75
76
77
78
79
class DecodeJob<R> implements DataFetcherGenerator.FetcherReadyCallback,
Runnable,
Comparable<DecodeJob<?>>,
Poolable {

@Override
public void onDataFetcherReady(Key sourceKey, Object data, DataFetcher<?> fetcher,
DataSource dataSource, Key attemptedKey) {
this.currentSourceKey = sourceKey;
this.currentData = data;
this.currentFetcher = fetcher;
this.currentDataSource = dataSource;
this.currentAttemptingKey = attemptedKey;
if (Thread.currentThread() != currentThread) {
//分析3:
runReason = RunReason.DECODE_DATA;
callback.reschedule(this);
} else {
GlideTrace.beginSection("DecodeJob.decodeFromRetrievedData");
try {
decodeFromRetrievedData();
} finally {
GlideTrace.endSection();
}
}
}

private void runWrapped() {
switch (runReason) {
case INITIALIZE:
stage = getNextStage(Stage.INITIALIZE);
currentGenerator = getNextGenerator();
runGenerators();
break;
case SWITCH_TO_SOURCE_SERVICE:
runGenerators();
break;
case DECODE_DATA:
decodeFromRetrievedData();
break;
default:
throw new IllegalStateException("Unrecognized run reason: " + runReason);
}
}

private void decodeFromRetrievedData() {
...
Resource<R> resource = null;
try {
resource = decodeFromData(currentFetcher, currentData, currentDataSource);
} catch (GlideException e) {
e.setLoggingDetails(currentAttemptingKey, currentDataSource);
throwables.add(e);
}
if (resource != null) {
//1
notifyEncodeAndRelease(resource, currentDataSource);
} else {
runGenerators();
}
}

private void notifyEncodeAndRelease(Resource<R> resource, DataSource dataSource) {
...
//2
notifyComplete(result, dataSource);

...
// Call onEncodeComplete outside the finally block so that it's not called if the encode process
// throws.
onEncodeComplete();
}

private void notifyComplete(Resource<R> resource, DataSource dataSource) {
setNotifiedOrThrow();
//3
callback.onResourceReady(resource, dataSource);
}
}

分析3:在这里我们看到了RunReason.DECODE_DATA,这个枚举代表处理返回的图片资源。然后调用了callback.reschedule(this);然后就会重新执行DecodeJob里的run()->runWrapped(),因为刚才runReason=DECODE_DATA,所以下一步会执行到decodeFromRetrievedData()方法。经过1.notifyEncodeAndRelease(…) ->2. notifyComplete(…) -> 3.callback.onResourceReady(…)。

1
2
3
4
5
6
7
8
9
10
11
12
13
14
15
16
17
18
19
20
21
22
23
24
25
26
27
28
29
30
31
32
33
34
35
36
37
38
39
40
41
42
43
44
45
46
47
class EngineJob<R> implements DecodeJob.Callback<R>,Poolable {
//成功加载资源时调用。
@Override
public void onResourceReady(Resource<R> resource, DataSource dataSource) {
this.resource = resource;
this.dataSource = dataSource;
//通过Handler发送消息MSG_COMPLETE到主线程
MAIN_THREAD_HANDLER.obtainMessage(MSG_COMPLETE, this).sendToTarget();
}

private static class MainThreadCallback implements Handler.Callback {

@Synthetic
@SuppressWarnings("WeakerAccess")
MainThreadCallback() { }

@Override
public boolean handleMessage(Message message) {
EngineJob<?> job = (EngineJob<?>) message.obj;
switch (message.what) {
case MSG_COMPLETE:
//在主线程处理结果
job.handleResultOnMainThread();
break;

...

}
return true;
}
}
void handleResultOnMainThread() {
stateVerifier.throwIfRecycled();
...

//noinspection ForLoopReplaceableByForEach to improve perf
for (int i = 0, size = cbs.size(); i < size; i++) {
ResourceCallback cb = cbs.get(i);
if (!isInIgnoredCallbacks(cb)) {
engineResource.acquire();
//这里通过for循环调用了所有的ResourceCallback的方法。
cb.onResourceReady(engineResource, dataSource);
}
}
...
}
}

那这里的ResourceCallback是一个接口,那么是在哪里实现的这个接口呢?下面我们梳理一下

首先看一下SingleRequest的onSizeReady(),这个方法里调用了engine.load(…,this),并将this(SingleRequest)作为参数,又因为SingleRequest实现了ResourceCallback,所以,上面for循环里回调的onResourceReady(…)方法,就是SingleRequest重写的onResourceReady(…)方法。

1
2
3
4
5
6
7
8
9
10
11
12
13
14
15
16
17
18
19
20
21
22
23
24
25
26
27
28
29
30
31
public class Engine implements EngineJobListener,
MemoryCache.ResourceRemovedListener,
EngineResource.ResourceListener {

public <R> LoadStatus load(
GlideContext glideContext,
Object model,
Key signature,
int width,
int height,
Class<?> resourceClass,
Class<R> transcodeClass,
Priority priority,
DiskCacheStrategy diskCacheStrategy,
Map<Class<?>, Transformation<?>> transformations,
boolean isTransformationRequired,
boolean isScaleOnlyOrNoTransform,
Options options,
boolean isMemoryCacheable,
boolean useUnlimitedSourceExecutorPool,
boolean useAnimationPool,
boolean onlyRetrieveFromCache,
ResourceCallback cb) {

//ResourceCallback在这里进行了注册
engineJob.addCallback(cb);
engineJob.start(decodeJob);

return new LoadStatus(cb, engineJob);
}
}
1
2
3
4
5
6
7
8
9
10
11
12
13
14
15
16
17
18
19
20
21
22
23
24
25
26
27
28
29
30
31
32
33
34
35
36
37
38
39
40
41
42
43
44
45
46
47
48
49
50
51
52
53
54
55
public final class SingleRequest<R> implements Request,
SizeReadyCallback,
ResourceCallback,
FactoryPools.Poolable {

@Override
public void onSizeReady(int width, int height) {

loadStatus = engine.load(
glideContext,
model,
requestOptions.getSignature(),
this.width,
this.height,
requestOptions.getResourceClass(),
transcodeClass,
priority,
requestOptions.getDiskCacheStrategy(),
requestOptions.getTransformations(),
requestOptions.isTransformationRequired(),
requestOptions.isScaleOnlyOrNoTransform(),
requestOptions.getOptions(),
requestOptions.isMemoryCacheable(),
requestOptions.getUseUnlimitedSourceGeneratorsPool(),
requestOptions.getUseAnimationPool(),
requestOptions.getOnlyRetrieveFromCache(),
this);//关键代码
}

@Override
public void onResourceReady(Resource<?> resource, DataSource dataSource) {
...
//通过get方法获取Bitmap
Object received = resource.get();
...
onResourceReady((Resource<R>) resource, (R) received, dataSource);
}

private void onResourceReady(Resource<R> resource, R result, DataSource dataSource) {
...
try {
...
if (!anyListenerHandledUpdatingTarget) {
Transition<? super R> animation =
animationFactory.build(dataSource, isFirstResource);
//核心代码
target.onResourceReady(result, animation);
}
} finally {
isCallingCallbacks = false;
}

notifyLoadSuccess();
}
}
SingleRequest的onResourceReady(...)方法最后调用了target.onResourceReady(result, animation);这个target就是我们在最开始调用Glide.into(imageview)时Imageview的包装类BitmapImageViewTarget。但是在BitmapImageViewTarget这个类里并没有onResourceReady()方法,因为BitmapImageViewTarget继承了ImageViewTarget,我们在ImageViewTarget中找到了这个重写的onResourceReady()方法。 
1
2
3
4
5
6
7
8
9
10
11
12
13
14
15
16
17
18
19
20
21
22
23
public abstract class ImageViewTarget<Z> extends ViewTarget<ImageView, Z>
implements Transition.ViewAdapter {

@Override
public void onResourceReady(@NonNull Z resource, @Nullable Transition<? super Z> transition) {
if (transition == null || !transition.transition(resource, this)) {
// 核心代码
setResourceInternal(resource);
} else {
maybeUpdateAnimatable(resource);
}
}

private void setResourceInternal(@Nullable Z resource) {
// Order matters here. Set the resource first to make sure that the Drawable has a valid and
// non-null Callback before starting it.
//这里调用了抽象方法setResource。
setResource(resource);
maybeUpdateAnimatable(resource);
}

protected abstract void setResource(@Nullable Z resource);
}
**BitmapImageViewTarget重写了setResource(@Nullable Z resource)方法**
1
2
3
4
5
6
7
8
9
10
11
12
13
14
15
16
/**
* A {@link com.bumptech.glide.request.target.Target} that can display an {@link
* android.graphics.Bitmap} in an {@link android.widget.ImageView}.
*/
public class BitmapImageViewTarget extends ImageViewTarget<Bitmap> {
/**
* Sets the {@link android.graphics.Bitmap} on the view using {@link
* android.widget.ImageView#setImageBitmap(android.graphics.Bitmap)}.
*
* @param resource The bitmap to display.
*/
@Override
protected void setResource(Bitmap resource) {
view.setImageBitmap(resource);
}
}

至此,通过 view.setImageBitmap(resource)将Bitmap设置到了Imageview上,图片也就显示出来了。可见into()方法是极其复杂的。Glide整个主线流程到此分析结束。

深度剖析Android 10大开源框架

发表于 2020-08-05 | 分类于 Android源码分析

第一章:介绍

流程,原理,机制,核心类源码剖析

  1. 网络框架:Okhttp / retrofit
  2. 依赖注入:butterknife / dagger2
  3. 异步处理:rxjava / eventbus
  4. 图片框架::glide / picasso
  5. 性能优化:leakcanary / blockcanary

第二章:okhttp

  1. OkHttpClient 和 Request 都可以通过Builder模式创建。OkHttpClient可以通过buil模式设置请求的

  2. client.dispatcher().enqueue(new AsyncCall(responseCallback));

okhttp1

3.

okhttp1

  1. 问题1:okhttp 如何实现同步异步请求?

​ 答:发送同步 / 异步请求都会在dispatcher 中管理其状态。

  1. 问题2:到底什么是dispatcher?

​ 答:dispatcher 的作用为维护请求的状态,并维护一个线程池,用于执行请求。

okhttp1

6.问题3:异步请求为什么需要两个队列?

okhttp1

  1. Okhttp 的任务调度

okhttp1

​ 答:会在一个请求结束后,调用 Dispatcher 里的finish方法时,finish方法里又调用了promoteCalls(),这里会把readyAsycCalls里等待的请求添加到runningAsyncCalls,并且通过线程池executorService().execute(call)执行这个请求。

  1. okhttp1

  2. Okhttp 拦截器

okhttp1

  1. okhttp1

okhttp1

  1. getResponseWithInterceptorChain()

这个方法所做的就是构成了一个拦截器的链,然后通过依次执行每一个不同功能的拦截器,来获取我们服务器的响应返回。

13.

okhttp1

14.

okhttp1

15.

okhttp1

16.

okhttp1

  1. okhttp1

18.

okhttp1

okhttp会将客户端和服务端的连接抽象成一个Connection接口类,它的实现类就是RealConnection。

  1. ConnectionPool

okhttp1

okhttp1

20.

okhttp1

  1. CallServerInterception

这里面几个重点类:

  • RealInterception:okhttp拦截器中的一个链,所有的网络请求正式通过这个链,链接到一起完成相应的功能。正是proceed方法能让依次进行下一个链的操作。
  • Httpcodec:okhttp中将所有的流对象都封装成了Httpcodec这个类,这是一个接口,CallServerInterceptor这个拦截器正是通过Httpcodec里的Socket流来完成操作的 。简单讲就是Httpcodec将request编码,将response解码。HttpCodec是对 HTTP 协议操作的抽象,有两个实现:Http1Codec和Http2Codec,顾名思义,它们分别对应 HTTP/1.1 和 HTTP/2 版本的实现。在这个方法的内部实现连接池的复用处理

  • StreamAllocation:它是用来建立okhttp请求所需要的其他的网络设施的组件,它的作用是用来分配Stream。它相当于一个管理类,维护了服务器连接、并发流。

  • RealConnection:okhttp会将客户端和服务端的连接抽象成一个Connection连接,而这个抽象连接的具体实现就是RealConnection。
  • Request: 代表网络请求。

22.

okhttp1

拦截器链里的拦截器

okhttp1

  • RetryAndFollowUpInterceptor :主要是重试和重定向我们的请求。
  • CacheInterceptor:处理缓存。负责读取缓存直接返回、更新缓存。
  • BridgeInterceptor:负责okhttp请求和响应对象与实际的http协议中请求和响应的转换。转换过程中可以处理一些cookie相关的内容。比如请求时,对必要的Header进行一些添加,接收响应时,移除必要的Header。
  • ConnectInterceptor: 负责和服务器建立连接。
  • CallServerInterceptor:负责完成最终的网络请求。负责发送请求和响应两大工作。负责向服务器发送请求数据、从服务器读取响应数据。

23.

okhttp1

24.

okhttp1

第三章:Retrofit

  • App应用程序通过Retrofit请求网络,实际上是使用Retrofit接口层封装请求参数,之后由OkHttp完成后续的请求操作。
  • 在服务端返回数据之后,OkHttp 将原始的结果交给Retrofit,Retrofit根据用户的需求对结果进行解析。

retrofit1

retrofit1

Retrofit 将每一个Http请求抽象成了java 接口,然后用注解配置请求的参数。内部实现原理就是用动态代理将接口的注解翻译成一个一个的请求,再有我们的线程池来执行请求。

  1. 动态代理:代理类在程序运行时创建的代理方式。不用频繁的修改每一个代理类的函数。

retrofit1

retrofit1

  1. 涉及到的设计模式:
  • 工厂设计模式:将类实例化的操作与使用对象的操作相分开,这样客户端使用的时候不需要知道具体参数,就可以通过Factory提供给我们的静态方法,来创建我们需要的产品。
  • 抽象工厂模式:CallAdapter
  • 简单工厂模式:Platform 获取平台
  • 外观模式:屏蔽了Retrofit内部细节,使用者只关注Retrofit,通过Retrofit设置参数就行了。
  • 策略模式:工厂模式强调的是生产不同的对象。策略模式是这些不同对象的策略方法具体实现。
  • 适配器模式:将OkHttpCall适配成不同平台(Android、Java8、ios、Rxjava)的Call。
  • 观察者模式:Call是被观察者,OkHttpCall实现了Call,是实际的被观察者。Callback是被观察者。

retrofit1

retrofit1

  1. retrofit1

BAT大牛带你深度剖析Android 10大开源框架

ButtterKnife和AOP

发表于 2020-08-05 | 分类于 Android源码分析
  1. ButtterKnife 的工作原理

    • 编译的时候扫描注解,并做相应处理,生成java代码,生成 java 代码是调用 javapoet 库生成的。
    • 调用 ButterKnife.bing(this);方法的时候,将 ID 与对应的上下文绑定在一起。
  2. AOP 插桩工具 AspectJ、ASM、ReDex

    练习了AspectJ的使用

    参考:

    Android开发高手课:27 | 编译插桩的三种方法:AspectJ、ASM、ReDex

    深入理解Android之AOP

    AspectJ 在 Android 中的使用

    https://github.com/raphw/byte-buddy

    HujiangTechnology/gradle_plugin_android_aspectjx

geenDao 源码分析

发表于 2020-03-05 | 分类于 Android源码分析

greenDao 源码分析

Introduction

一. 核心类

1. DaoMaster

  • DaoMaster是使用greenDao的入口。

  • DaoMaster持有数据库对象,并且管理特定表的Dao类(而非对象)。

  • 它具有创建表或者删除表的静态方法。

  • 其内部类 OpenHelper 和 DevOpenHelper 是 SQLiteOpenHelper 的实现,
    可在 SQLite 数据库中创建表 。

2. DaoSession

  • DaoSession 管理特定表的所有可用DAO对象,这些对象可以通过相应的get方法获取。

  • DaoSession 还为实体提供了一些通用的方法,例如插入、加载、更新、刷新和删除。

  • DaoSession 还可以管理缓存。

3. XXXDao

  • XXXDao 是数据访问对象,可以持久化和查询实体。

  • 对于每一个实体,greeDao 会自动生成一个 DAO。

  • 它比 DaoSession 具有更多的持久化方法,例如count, loadAll, insertInTx。

4. Entities

  • 实体,即持久化的对象。通常,实体是使用标准 Java属性(例如 POJO 或 JavaBean )表示数据库行的对象。

  • 注意:只支持 Java class,如果你使用 Kotlin ,实体类仍然要使用 Java class 。

  • Entity注解里可配置的属性

    @Entity(

    // If you have more than one schema, you can tell greenDAO
    // to which schema an entity belongs (pick any string as a name).
    schema = "myschema",
    
1
2
3
4
5
6
7
8
9
10
11
12
13
14
15
16
17
18
19
20
21
22
23
24
25
26
27
28
    // Flag to make an entity "active": Active entities have update,
// delete, and refresh methods.
active = true,

// Specifies the name of the table in the database.
// By default, the name is based on the entities class name.
nameInDb = "AWESOME_USERS",

// Define indexes spanning multiple columns here.
indexes = {
@Index(value = "name DESC", unique = true)
},

// Flag if the DAO should create the database table (default is true).
// Set this to false, if you have multiple entities mapping to one table,
// or the table creation is done outside of greenDAO.
createInDb = false,

// Whether an all properties constructor should be generated.
// A no-args constructor is always required.
generateConstructors = true,

// Whether getters and setters for properties should be generated if missing.
generateGettersSetters = true
)
public class User {
...
}

5. 图示以上几个类的关系

Core Classes

二. 源码分析

1. 结构图

greenDao整体结构图

​ 图片来源于:https://blog.csdn.net/kieCool/article/details/73930813

2. 参考:

  1. 官网
  2. 嘎啦果安卓兽:GreenDAO源码整体流程梳理
  3. 上面的时序图可配合这个文章查看:https://juejin.im/post/5d3a9193e51d4510a37bacd8
  4. jsonchao

三. 需要注意的几个点

1. 数据库更新:

  • 为简单起见,使用由生成的DaoMaster类提供的帮助器类DevOpenHelper创建数据库。 它是DaoMaster中OpenHelper类的实现,它为您完成了所有数据库的设置。 无需编写“ CREATE TABLE”语句。

    但是,DevOpenHelper在数据库更新时会删除所有表(在onUpgrade()中)。 因此,建议您创建并使用DaoMaster.OpenHelper的子类。

    然后,Activities and fragments 可以调用getDaoSession()来访问所有实体DAO。

  • GreenDaoUpgradeHelper 是一个greenDao的数据库升级帮助类。使用它可以很容易解决数据库升级问题,只需一行代码。原始代码来自stackoverflow。

2. 主键限制:

实体类必须有一个long/Long类型的主键。对于这种情况,可将你的关键属性定义为附加属性,但是要为其创建唯一索引。

1
2
3
4
5
@Id
private Long id;

@Index(unique = true)
private String key;

3. 多对多

  • 对于多对多的实体,因为第一次获取的时候会缓存,所以再次获取的不是新数据,如果更新了数据,需要手动更新获取的数据,防止使用缓存。

  • 或者先清除缓存,再获取数据。

    1
    2
    3
    // clear any cached list of related orders
    customer.resetOrders();
    List<Order> orders = customer.getOrders();

4. Convert annotation and property converter

  • 注意:如果在实体类中定义自定义Type或者converter,要使用static修饰他们。

Android - Handler消息机制

发表于 2020-02-29 | 分类于 Android源码分析

Android - Handler 消息机制

一. 概念

1. Handler

个人理解:

  • 消息辅助类,Handler 是主线程和子线程沟通的桥梁,可以通过以 send / post 为前缀的一些方法(例如:sendMessage、postDelayed)发送消息(Message)到消息队列(MessageQueue);也可以处理消息循环器(Looper)分发过来的消息(Message),轻松的将一个任务切换到 Handler 所在的线程中执行。Android不允许在子线程中更新UI,在子线程执行耗时操作后,通过Handler将更新UI的操作切换到主线程执行。

Google官方文档的介绍(我的蹩脚翻译):

  • 通过 Handler 可以发送和处理 Message / Runnable 对象,Message 和 Runnable 跟线程的MessageQueue 相关。每个 Handler 实例都关联一个线程(Thread)和该线程的消息队列(MessageQueue)。创建Handler的同时会绑定到 Looper 。Looper 可以在 MessageQueue 里 添加 /取出 Message / Runnable ,并且 Looper 是运行在创建Handler的线程中。
  • Handler 有两个主要的用途:
    1. 使 Message / Runnable 在未来的某个时间点得到处理。
    2. 处理不同线程的队列消息
  • Handler可以通过post(Runnable), postAtTime(java.lang.Runnable, long), postDelayed(Runnable, Object, long), sendEmptyMessage(int), sendMessage(Message), sendMessageAtTime(Message, long), and sendMessageDelayed(Message, long)发送消息。以 post 版本的方法是将 Runnable 对象封装成Message添加到消息队列,当Handler接收到消息时,会回调Runnable的run()方法;sendMessage 版本的方法将携带一些信息的Message对象添加到消息队列,当接收消息时,会回调handleMessage(Message)方法,这个方法在你创建Handler的时候由自己来重写。

2. Message

个人理解:

  • 存储通信数据信息,是Handler发送、处理的消息对象。用于在主线程和子线程中传递。在子线程中将各种需要更新到UI的数据信息封装到Message中,然后通过Handle在主线程中解析出Message的信息,更新到UI。

Google官方文档的介绍(我的翻译):

  • Message 可用于发送给 Handler ,它包含三种int类型(what、arg1、arg2)和一个对象(obj)字段,不需要你自己再添加配置字段。

    ☆ 虽然 Message 的构造方法是 public 的,但是最高效的方式是通过调用 Message.obtain() 或者 Handler#obtainMessage 方法获得 Message 对象, 这种方式是通过对象池来获取 Message 。

3. MessageQueue

个人理解:

  • 消息队列, 消息队列的主要功能是向消息池发送消息(MessageQueue.enqueueMessage())和取走消息池的消息(MessageQueue.next());尽管MessageQueue叫消息队列,但是它的内部实现并不是用的队列,实际上它是通过一个单链表的数据结构(即Message)来维护消息列表,单链表在插入和删除上比较有优势。

Google官方文档的介绍(我的翻译):

  • 一个简单的类,持有 Looper 分发的消息列表。Message 不是直接添加到 MessageQueue 中,而是通过跟Looper相关的Handler对象。
  • 可以通过 Looper.myQueue() 获取当前线程的MessageQueue。

4. Looper :

个人理解:

  • 消息循环器,通过 Looper.loop() 负责在消息队列(MessageQueue)循环取出消息(Message),并且分发给对应的处理者(Handler)。是消息队列(MessageQueue)与处理者(Handler)的通信媒介。每个线程只能拥有一个 Looper ;一个 Looper 可以绑定多个线程的 Handler;所以多个线程通过Handler 发送 Message 时,是往同1个 Looper 所持有的 MessageQueue 中发送消息,提供了线程间通信的可能。

Google 官方文档的介绍(我的翻译):

  • Looper这个类用于在线程中进行消息循环。默认创建的子线程没有 Looper,如果创建的话,在线程中调用 prepare() ,然后调用 loop() 开启消息循环。

  • 大部分与消息循环器(Looper)的交互是通过 Handler 类。

  • 下面是一个 Looper/Thread 的典型例子,通过 prepare() 和 loop() ,创建 Handler 和Looper交互。

1
2
3
4
5
6
7
8
9
10
11
12
13
14
15
class LooperThread extends Thread {
public Handler mHandler;

public void run() {
Looper.prepare();

mHandler = new Handler() {
public void handleMessage(Message msg) {
// process incoming messages here
}
};

Looper.loop();
}
}

二. 源码解读:

从一个普通的例子说起:

1
2
3
4
5
6
7
8
9
10
11
12
13
14
15
16
17
18
//1.在主线程以匿名内部类的方式创建Handler对象
private Handler mHandler = new Handler() {
@Override
public void handleMessage(@NonNull Message msg) {
//更新UI
}
};

new Thread(new Runnable() {
@Override
public void run() {
//2.创建消息对象
Message msg = Message.obtain();
msg.what = 1;
//3.在子线程中通过Handler发送消息到消息队列中
mHandler.sendMessage(msg);
}
}).start();

分析1:

1
2
3
4
5
6
7
8
9
10
11
12
13
14
15
16
17
18
19
20
21
22
23
24
25
26
27
28
29
30
31
32
33
34
35
/**
* Handler的无参构造方法
*
*/
public Handler() {
//待分析:1
this(null, false);
}

//分析:1
public Handler(@Nullable Callback callback, boolean async) {
//1.1 匿名类、内部类、本地类都必须声明为static,
//否则就会出现我们常看到的黄色代码块的警告,
//提示可能会出现内存泄漏。
//async默认是false,即创建Handler时,决定了以后创建的普通消息就是同步消息
if (FIND_POTENTIAL_LEAKS) {
final Class<? extends Handler> klass = getClass();
if ((klass.isAnonymousClass() || klass.isMemberClass() || klass.isLocalClass())&&
(klass.getModifiers() & Modifier.STATIC) == 0) {
Log.w(TAG, "The following Handler class should be static or leaks might occur: " +klass.getCanonicalName());
}
}

//1.2 在ThreadLocal中获取当前线程的Looper对象,如果没有Looper则无法创建Handler
mLooper = Looper.myLooper();
if (mLooper == null) {
throw new RuntimeException(
"Can't create handler inside thread " + Thread.currentThread()
+ " that has not called Looper.prepare()");
}
//1.3 消息队列,来自Looper对象
mQueue = mLooper.mQueue;
mCallback = callback;//回调方法
mAsynchronous = async;//设置消息是否为异步处理方式
}

问题:上述1.2 的Looper对象是怎么来的呢?

答:分两种情况:

  1. 如果在主线程中创建Handler。在 Android 应用进程启动时,会默认创建 1 个主线程 ActivityThread(Android的主线程就是 ActivityThread ,也叫UI线程),主线程的入口方法为 main() ,在 main() 方法中系统会通过 Looper.prepareMainLooper() 来创建主线程的 Looper 以及 MessageQueue ,并通过 Looper.loop() 来开启主线程的消息循环。这个过程就是上面代码所示。

  2. 如果在子线程中创建Handler。则必须为当前线程创建 Looper,所以需要手动调用Looper.prepare() 创建Looper,然后调用 loop() 开启消息循环。

1
2
3
4
5
6
7
8
9
10
11
12
13
14
15
16
17
18
19
20
public final class ActivityThread extends ClientTransactionHandler {
public static void main(String[] args) {
//...省略部分无关代码...

//通过Looper.prepareMainLooper()来创建主线程的Looper以及MessageQueue
//待分析:2
Looper.prepareMainLooper();

//...省略部分无关代码...

ActivityThread thread = new ActivityThread();
thread.attach(false, startSeq);

//...省略部分无关代码...

//待分析:3
//通过Looper.loop()来开启主线程的消息循环
Looper.loop();
}
}

分析2、分析3:

1
2
3
4
5
6
7
8
9
10
11
12
13
14
15
16
17
18
19
20
21
22
23
24
25
26
27
28
29
30
31
32
33
34
35
36
37
38
39
40
41
42
43
44
45
46
47
48
49
50
51
52
53
54
55
56
57
58
59
60
61
62
63
64
65
66
67
68
69
70
71
72
73
74
75
76
/**
* Looper这个类用于在线程中进行消息循环。
*/
public final class Looper {

//创建Looper的同时,创建了MessageQueue,并且绑定了当前线程
private Looper(boolean quitAllowed) {
mQueue = new MessageQueue(quitAllowed);
mThread = Thread.currentThread();
}

/**分析:2
* 初始化当前线程的Looper,并且标记为应用程序的主线程Looper。
* 应用程序的主线程Looper是Android环境自动创建的,所以
* 不需要你自己去调用这些方法。
*/
public static void prepareMainLooper() {
prepare(false);
synchronized (Looper.class) {
if (sMainLooper != null) {
throw new IllegalStateException("The main Looper has already been prepared.");
}
//主线程的Looper
sMainLooper = myLooper();
}
}

/** 默认手动创建的子线程没有Looper,如果创建的话,在子线程中调用prepare(),
* 然后调用 loop() 开启消息循环。
*/
private static void prepare(boolean quitAllowed) {
if (sThreadLocal.get() != null) {
//在这里也可以看出每个线程只能有 1 个Looper
throw new RuntimeException("Only one Looper may be created per thread");
}
//在这里创建了Looper,在上面Looper的构造方法里可以看出,创建Looper的同时,
//创建了MessageQueue,并且绑定了当前线程
sThreadLocal.set(new Looper(quitAllowed));
}

/**分析:3
* 在当前线程执行消息循环。在消息循环结束后要调用 quit() 方法
*/
public static void loop() {
//获取ThreadLocal存储的Looper对象
final Looper me = myLooper();

if (me == null) {
//在调用loop()之前必须通过Looper.prepare()获取Looper对象
throw new RuntimeException("No Looper; Looper.prepare() wasn't called on this thread.");
}

//获取Looper对象中的消息队列
final MessageQueue queue = me.mQueue;

//进入loop的消息循环
for (;;) {
//取出消息队列里的消息,这里会导致阻塞
//待分析:4
Message msg = queue.next();

if (msg == null) {
// No message indicates that the message queue is quitting.
return;
}

//通过Message的target(target是Handler对象)进行消息的派发,
//即回调Hander.dispatchMessage(msg)
//待分析:5
msg.target.dispatchMessage(msg);

//回收Message,放入消息池。
msg.recycleUnchecked();
}
}
}

分析4:

1
2
3
4
5
6
7
8
9
10
11
12
13
14
15
16
17
18
19
20
21
22
23
24
25
26
27
28
29
30
31
32
33
34
35
36
37
38
39
40
41
42
43
44
45
46
47
48
49
50
51
52
53
54
55
56
57
58
59
60
61
62
63
64
65
66
67
68
69
70
71
72
73
74
75
76
77
78
79
80
81
82
83
84
85
86
87
88
89
90
91
92
93
94
95
96
97
98
99
100
101
102
103
104
105
106
107
108
109
110
111
112
113
114
public final class MessageQueue {  
/**分析:4
* 在消息队列中取出下一条消息
*/
Message next() {

final long ptr = mPtr;
//当消息循环已经退出,则直接返回
if (ptr == 0) {
return null;
}

//在第一次循环迭代时为-1
int pendingIdleHandlerCount = -1;
int nextPollTimeoutMillis = 0;
for (;;) {
//...省略部分无关代码

//这是native的方法。nativePollOnce是阻塞操作,
//其中nextPollTimeoutMillis代表下一个消息到来前,
//还需要等待的时长;当nextPollTimeoutMillis = -1时,表示消息队列中无消息,会一直等待下去。
//当nextPollTimeoutMillis时长已经消耗完,或者消息队列被唤醒,都会返回。
nativePollOnce(ptr, nextPollTimeoutMillis);

synchronized (this) {
// Try to retrieve the next message. Return if found.
final long now = SystemClock.uptimeMillis();
android.os.Message prevMsg = null;
android.os.Message msg = mMessages;
//当消息的Handler为空时,则查询异步消息
if (msg != null && msg.target == null) {
//当查询到异步消息,则立刻退出循环
do {
prevMsg = msg;
msg = msg.next;
} while (msg != null && !msg.isAsynchronous());
}
if (msg != null) {
if (now < msg.when) {

//当异步消息的触发时间大于当前时间,则设置下一次轮循的超时时长。
//在下次循环时nativePollOnce(ptr, nextPollTimeoutMillis)执行等待这个时长。
//源码的注释是这样说的:下一个消息还没有就绪。设置一个唤醒该消息的超时时间。
nextPollTimeoutMillis = (int) Math.min(msg.when - now, Integer.MAX_VALUE);
} else {
// 获取一条消息,并返回给Looper.loop()的for循环里
mBlocked = false;
if (prevMsg != null) {
prevMsg.next = msg.next;
} else {
mMessages = msg.next;
}
msg.next = null;
if (DEBUG) Log.v(TAG, "Returning message: " + msg);
//设置消息的使用状态
msg.markInUse(); // void markInUse() { flags |= FLAG_IN_USE; }
return msg; // 返回MessageQueue中的下一条即将执行的消息
}
} else {
// 没有消息则返回-1
nextPollTimeoutMillis = -1;
}

//所有挂起的消息已经处理完毕,消息正在退出,返回null
if (mQuitting) {
dispose();
return null;
}

//当消息队列为空,或者消息队列里即将处理的消息是是第一条时。
if (pendingIdleHandlerCount < 0 && (mMessages == null || now < mMessages.when)) {
pendingIdleHandlerCount = mIdleHandlers.size();
}

if (pendingIdleHandlerCount <= 0) {
//没有dle handlers需要运行。则循环并等待
mBlocked = true;
continue;
}

if (mPendingIdleHandlers == null) {
mPendingIdleHandlers = new IdleHandler[Math.max(pendingIdleHandlerCount, 4)];
}
mPendingIdleHandlers = mIdleHandlers.toArray(mPendingIdleHandlers);
}

//只在第一次迭代循环时会进入下面的代码来运行idle handlers 。
for (int i = 0; i < pendingIdleHandlerCount; i++) {
final IdleHandler idler = mPendingIdleHandlers[i];
mPendingIdleHandlers[i] = null; // release the reference to the handler

boolean keep = false;
try {
keep = idler.queueIdle();//idle时执行的方法
} catch (Throwable t) {
Log.wtf(TAG, "IdleHandler threw exception", t);
}

if (!keep) {
synchronized (this) {
mIdleHandlers.remove(idler);
}
}
}

//重置idle handler个数为0,以保证不会再次重复运行
pendingIdleHandlerCount = 0;

//当调用一个空闲handler时,一个新message能够被分发,
//因此无需等待可以直接查询pending message.
nextPollTimeoutMillis = 0;
}
}
}

分析5 :

1
2
3
4
5
6
7
8
9
10
11
12
13
14
15
16
17
18
19
20
21
22
23
24
25
26
public class Handler {
/**分析:5
* 根据传入的消息方式,来决定处理消息的回调方法
*/
public void dispatchMessage(@NonNull Message msg) {

// 优先级1: 若msg.callback属性不为空,则代表使用了post(Runnable r)发送消息
// 则执行handleCallback(msg),即回调Runnable对象里复写的run()
if (msg.callback != null) {
handleCallback(msg);
} else {
//优先级2:如果mCallback!=null,则执行
if (mCallback != null) {
if (mCallback.handleMessage(msg)) {
return;
}
}
//优先级3:执行创建Handler时重写的handleMessage(msg)方法
handleMessage(msg);
}
}

private static void handleCallback(Message message) {
message.callback.run();
}
}

至此,消息循环、分发的过程分析完毕,总结一下:

  1. 通过 Looper.loop() 里的 for 循环来不断轮询消息;

  2. 通过 for 循环里的 MessageQueue.next() 方法获取下一条要处理的消息;

  3. MessageQueue 的 next() 方法去获取消息队列里的消息;

    • 成功获取到一条消息,则通过Message的target属性(即Handler)调用dispatchMessage(msg)方法处理消息,在该方法里又有三种不同的消息处理回调方式(代码里可以看出是有3种优先级顺序的),回调方式因创建Handler和发送消息方式的不同而不同。

    • 如果消息的触发时间大于当前时间,则在next()方法里阻塞,阻塞时间根据创建消息时设定的延迟时间决定;这里涉及到native的方法,有利于节省CPU的资源。

下一步,我们继续分析消息的发送、入队过程:

在子线程中通过Handler发送消息到消息队列中 :
  • send/post 发送消息的各种方法,最终都是调用 MessageQueue.enqueueMessage()方法

send方法:

1
2
3
4
5
6
7
8
9
10
11
12
13
14
15
16
17
18
19
20
21
22
23
24
25
26
27
28
29
30
31
32
33
34
35
36
37
38
39
40
41
42
43
44
45
46
47
48
49
50
51
52
53
54
55
56
57
58
59
60
61
public class Handler {
//将消息发送到消息队列
public final boolean sendMessage(@NonNull Message msg) {
return sendMessageDelayed(msg, 0);
}

public final boolean sendMessageDelayed(@NonNull Message msg, long delayMillis) {
if (delayMillis < 0) {
delayMillis = 0;
}
return sendMessageAtTime(msg, SystemClock.uptimeMillis() + delayMillis);
}

public boolean sendMessageAtTime(@NonNull Message msg, long uptimeMillis) {
//获取对应的消息队列对象
MessageQueue queue = mQueue;
if (queue == null) {
RuntimeException e = new RuntimeException(
this + " sendMessageAtTime() called with no mQueue");
Log.w("Looper", e.getMessage(), e);
return false;
}
return enqueueMessage(queue, msg, uptimeMillis);
}

public final boolean sendEmptyMessage(int what){
return sendEmptyMessageDelayed(what, 0);
}

public final boolean sendEmptyMessageDelayed(int what, long delayMillis) {
Message msg = Message.obtain();
msg.what = what;
return sendMessageDelayed(msg, delayMillis);
}

public final boolean sendMessageAtFrontOfQueue(@NonNull Message msg) {
//获取对应的消息队列对象
MessageQueue queue = mQueue;
if (queue == null) {
RuntimeException e = new RuntimeException(
this + " sendMessageAtTime() called with no mQueue");
Log.w("Looper", e.getMessage(), e);
return false;
}
return enqueueMessage(queue, msg, 0);
}

private boolean enqueueMessage(@NonNull MessageQueue queue, @NonNull Message msg,
long uptimeMillis) {
//将当前的Handler对象赋值给msg.target;
//这里可以和Looper.loop()的for循环里的msg.target.dispatchMessage(msg)联系起来理解;
//target就是在这里被赋值的。
msg.target = this;
msg.workSourceUid = ThreadLocalWorkSource.getUid();
if (mAsynchronous) {
msg.setAsynchronous(true);
}
//调用消息队列的enqueueMessage(),将消息加入消息队列
return queue.enqueueMessage(msg, uptimeMillis);
}
}

post方法:

1
2
3
4
5
6
7
8
9
10
11
12
13
14
15
16
17
18
19
20
21
22
23
24
25
26
public class Handler {
public final boolean post(@NonNull Runnable r) {
return sendMessageDelayed(getPostMessage(r), 0);
}

public final boolean postAtFrontOfQueue(@NonNull Runnable r) {
return sendMessageAtFrontOfQueue(getPostMessage(r));
}

public final boolean postAtTime(@NonNull Runnable r, long uptimeMillis) {
return sendMessageAtTime(getPostMessage(r), uptimeMillis);
}

public final boolean postDelayed(@NonNull Runnable r, long delayMillis) {
return sendMessageDelayed(getPostMessage(r), delayMillis);
}

//可以看出,post方式是通过将Runnable赋值给Message的callback属性,封装成Message,
//归根到底和send方式一样,都是发送的Message消息。
private static Message getPostMessage(Runnable r, Object token) {
Message m = Message.obtain();
m.obj = token;
m.callback = r;
return m;
}
}

开始分析 MessageQueue.enqueueMessage() 方法

1
2
3
4
5
6
7
8
9
10
11
12
13
14
15
16
17
18
19
20
21
22
23
24
25
26
27
28
29
30
31
32
33
34
35
36
37
38
39
40
41
42
43
44
45
46
47
48
49
50
51
52
53
54
55
56
57
58
59
60
public final class MessageQueue {
boolean enqueueMessage(android.os.Message msg, long when) {
//Message必须有一个target(即Handler)
if (msg.target == null) {
throw new IllegalArgumentException("Message must have a target.");
}
if (msg.isInUse()) {
throw new IllegalStateException(msg + " This message is already in use.");
}
synchronized (this) {
if (mQuitting) {
IllegalStateException e = new IllegalStateException(
msg.target + " sending message to a Handler on a dead thread");
Log.w(TAG, e.getMessage(), e);
//如果是正在退出时,回收msg,加入到消息池。recycle()方法我们在下面会分析。
msg.recycle();
return false;
}
msg.markInUse();
msg.when = when;
android.os.Message p = mMessages;
boolean needWake;
//p == null 即消息队列里没有消息,或者msg的触发时间是队列中最早的,则将当前消息作为队头插入;
if (p == null || when == 0 || when < p.when) {
msg.next = p;
mMessages = msg;
//如果此时消息队列的循环处于阻塞状态,则唤醒
needWake = mBlocked;
} else {
//将消息按时间顺序插入到MessageQueue。一般地,不需要唤醒事件队列,
//除非消息队头存在barrier,并且同时Message是队列中最早执行的异步消息。
needWake = mBlocked && p.target == null && msg.isAsynchronous();
android.os.Message prev;
for (;;) {
prev = p;
p = p.next;
if (p == null || when < p.when) {
//1.第一次循环,msg的触发时间比队头的消息还要早,则跳出for循环,直接加到队头。
//2.往后再次循环,如果遍历到队尾(即 p 节点==null),
//或者当前遍历到的 p 节点的触发时间大于msg的触发时间,则跳出for循环
//将此msg添加到p节点之前(即msg.next = p)。
break;
}
//如果新加入的消息是异步消息,并且通过上面的if判断可知:如果新消息按照时间顺序排列的话,不
//是队头的元素(即比队头的元素触发时间还要晚),则不需要唤醒(即needWake = false)。
if (needWake && p.isAsynchronous()) {
needWake = false;
}
}
//链表的操作,将msg添加到链表相应的位置。
msg.next = p; // invariant: p == prev.next
prev.next = msg;
}
// 消息没有退出,我们认为此时mPtr != 0
if (needWake) {
nativeWake(mPtr);
}
}
return true;
}

至此,消息入队的过程分析完毕,总结一下:

  • Message入队是按照Message触发时间的先后顺序排列的,队头的消息是将要最早触发的消息。当有消息需要加入消息队列时,会从队头开始遍历,直到找到消息应该插入的合适位置,以保证所有消息的时间顺序。

下面,我们继续分析创建消息(Message)对象的最佳方式:

1
2
3
4
5
6
7
8
9
10
11
12
13
14
15
16
17
18
19
20
//创建消息对象
Message msg = Message.obtain();

/**
* 在消息池里返回一个Message对象。避免了创建新对象。
*/
public static Message obtain() {
synchronized (sPoolSync) {
if (sPool != null) {
Message m = sPool;//取出一个消息对象
sPool = m.next;
m.next = null;//将取出的消息在链表里断开连接
m.flags = 0; // 清除 in-use flag
sPoolSize--; //消息池的可用大小减一
return m;
}
}
//当消息池为空时,直接新建消息对象
return new Message();
}

以上获取Message实例的过程总结为:

  • 如果消息池不是空的,从消息池(链表结构)的头部取走一个Message,并将链表的头部更新为取走消息的next(即下一条Message)。否则新建Message对象。

下面分析recycle(即Message的回收):

  • 其中在Looper.loop()方法取出一条消息交给Handler处理后,有一个回收Message到消息池的操作,调用的是recycleUnchecked():
1
2
3
4
5
6
7
8
9
10
11
12
13
14
15
16
17
18
19
20
21
22
23
24
25
26
27
28
29
30
31
32
33
34
35
36
37
38
39
40
41
42
public final class Message implements Parcelable {
public void recycle() {
//判断消息是否正在使用
if (isInUse()) {
if (gCheckRecycle) {
throw new IllegalStateException("This message cannot be recycled because it "
+ "is still in use.");
}
return;
}
recycleUnchecked();
}

/**
* 该方法在处理排队的消息时,在MessageQueue 和 Looper内部调用
*/
void recycleUnchecked() {
//将消息标示为IN_USE,并清空消息所有的参数。
flags = FLAG_IN_USE;
what = 0;
arg1 = 0;
arg2 = 0;
obj = null;
replyTo = null;
sendingUid = UID_NONE;
workSourceUid = UID_NONE;
when = 0;
target = null;
callback = null;
data = null;

synchronized (sPoolSync) {
//消息池的大小是MAX_POOL_SIZE = 50,当消息池没有满时,将Message对象加入消息池
if (sPoolSize < MAX_POOL_SIZE) {
next = sPool;
sPool = this;//将消息添加到消息池的头部
//消息池的可用大小进行加1操作
sPoolSize++;
}
}
}
}

以上总结为:为了提高效率,减少对象频繁的创建和回收过程,提供了一个消息缓存队列。消息池的默认大小是50,当需要回收消息时(比如:分发消息给Handler处理后),将消息的属性参数清空,然后将回收的消息添加到消息池的头部。

至此,Android的消息机制分析完毕,Android的消息机制源码远没有这么简单,以上仅从Java层进行了分析,对于Native层的分析没有涉及到。希望大家一起加油,踏踏实实分析源码的脉络,遇到同样的问题,做到胸有成竹。也欢迎在留言区一起讨论,一起成长!
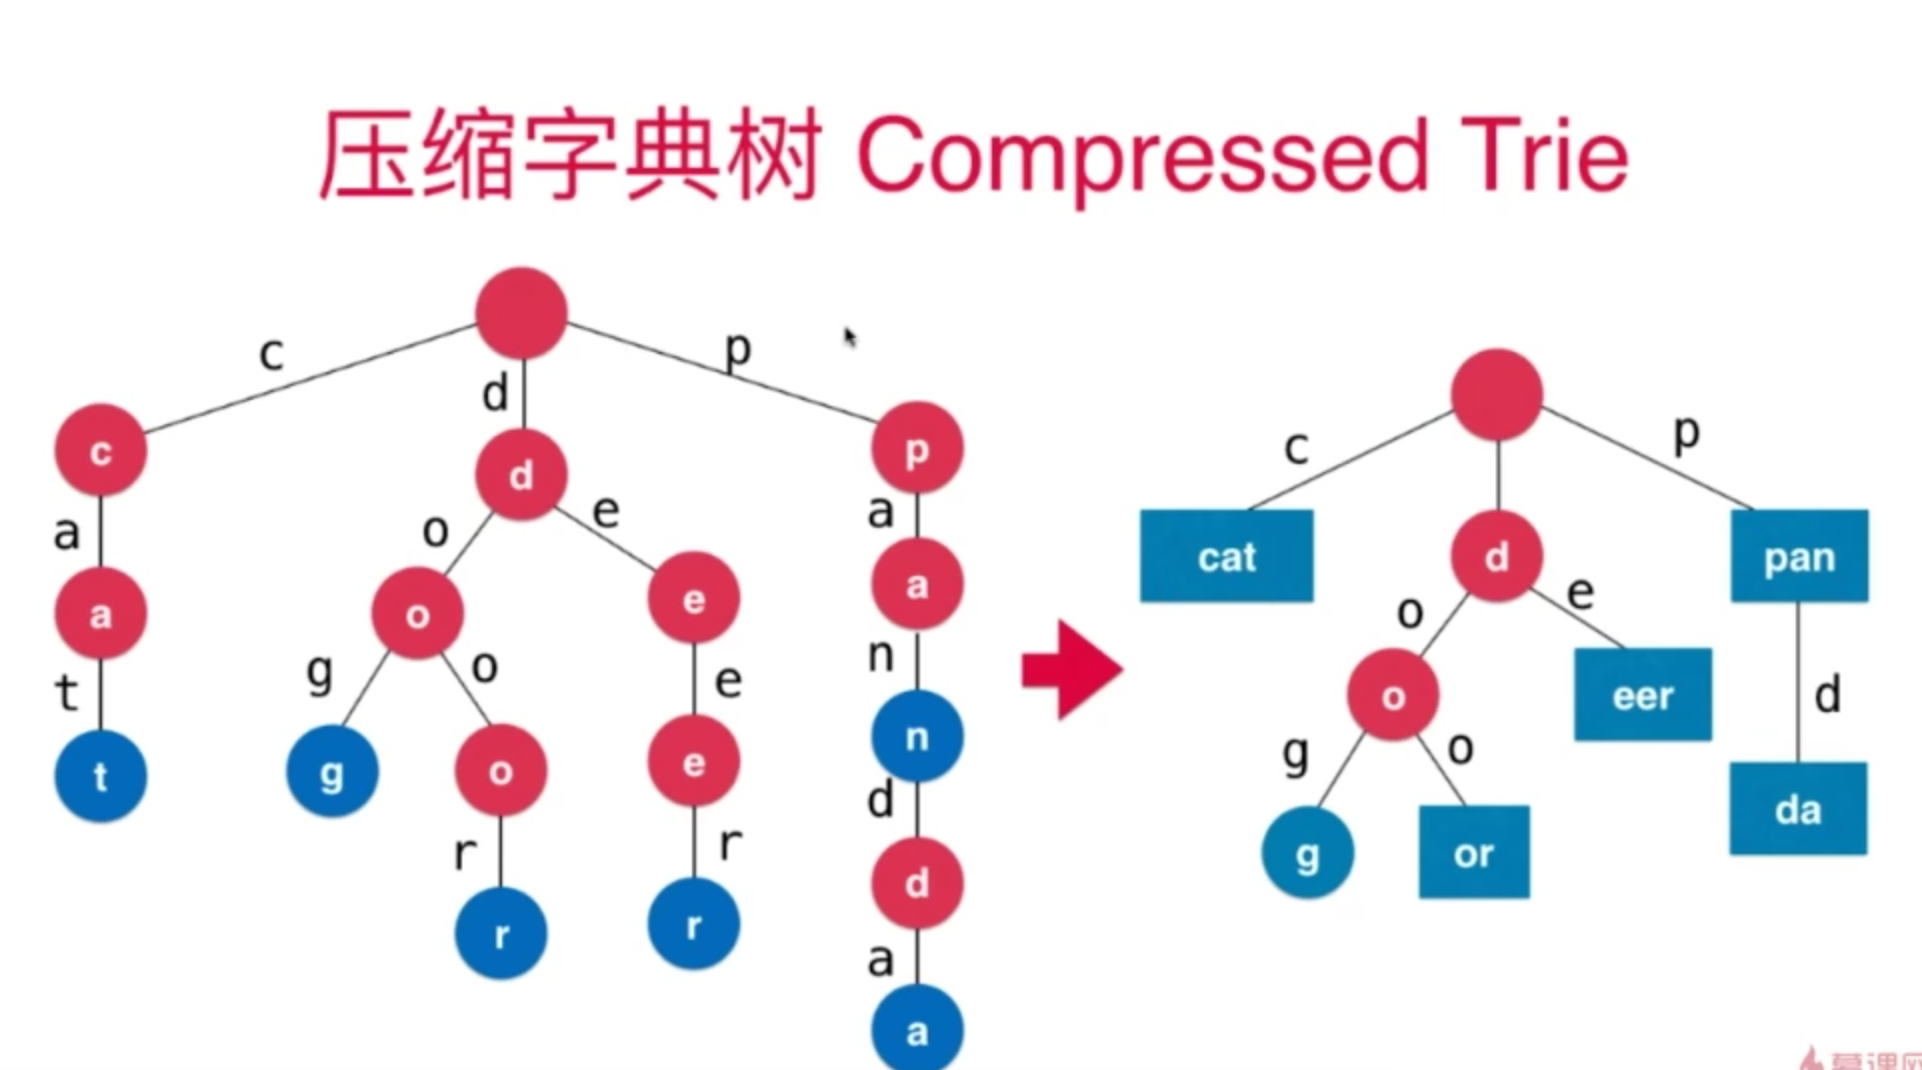
如果想及时收到我的文章更新,可关注以下公众号。

我的公众号二维码

参考资料:

1.https://developer.android.google.cn/reference/android/os/Handler?hl=en

2.http://gityuan.com/2015/12/26/handler-message-framework/

3 .https://www.jianshu.com/p/b4d745c7ff7a

4.Android开发艺术探索第十章

技术人员典型的焦虑和烦恼

发表于 2020-02-29 | 分类于 杂谈

技术人员典型的焦虑和烦恼

  1. 加班
    • 加班时间长,没有时间提升
  2. 搬砖
    • 工作没有技术含量
  3. 成长
    • 成长到了瓶颈期
  4. 学习
    • 东西太多学不过来
  5. 彷徨
    • 失去方向,未来要干什么,要做什么不知道
认识一下这个世界
  1. 这个世界是怎么组成的?

    • 基础技术、工具、产品、项目……
    • 大家的分工是怎么来的?
  2. 这个世界需要什么样的人?以及这些人的特点

    • 劳工、技工、特种工、设计、架构、经理……
    • Google评分卡
  3. 这个世界的技术趋势和规律是什么样的?

    • 工业革命、信息化革命

    • 技术更新淘汰、风口是什么样的

      历史上发生的,未来一定也会发生,现在没发生的,未来可能发生

认识自己
  1. 自己的喜好

    • 找到自己可以坚持不会放弃的东西
  2. 自己的特长是什么

    • 找到自己可以干成的事
    • 找到别人会来请教你的事
  1. 自己有什么

    • 找到可以承上启下的东西
  2. 自己可以付出什么

    • 找到自己的本金来投资,找到可以付出和牺牲的东西

第二部分 夯实基础,一通百通

为什么要学习基础技术
  1. 一通百通

    • 所有的技术原理和本质都在基础技术上
  2. 突破瓶颈

    • 只有基础技术才能让你上升到更高的层次

    • 在技术的世界里,量变永远无法导致质变

  3. 自己推导

    • 掌握基础技术以及原理可以让自己推导答案和趋势
有哪些基础技术
  1. 程序语言

    • 原理、编程范式、设计模式、代码设计、类库……
  2. 系统

    • 计算机原理、操作系统、网络协议、数据库……
  3. 中间件

    • 消息队列、缓存、网关、代理……
  4. 理论知识

    • 算法和数据结构、系统架构、分布式……
如何识别新的技术
  1. 解决了什么样的问题

    • 任何技术的出现都是要解决已知问题的
    • 降低技术门槛、提高开发效率、提升稳定性
  2. 提升了什么样的能力

    • 可以计算更为复杂的计算

    • 可以自动化更为复杂和更为困难的事

      闲聊:卡车问法拉利司机,你的车能拉多少吨货,不要把自己的长处和别人的短处比。

  3. 会成为主流技术的特征

    • 有大公司做背书

    • 有杀手级应用

    • 有强大的社区

      闲聊:Go是google发明的,解决了java难用的问题,提升了并发编程的能力,社区强大;ruby社区不行。java不会被Go取代。Python一般。大数据挺好,更偏算法,分两块,基础层的,数学模型算法层的。

第三部分 找到方法,事半功倍

主动学习 VS 被动学习
学习的一些观点
  1. 学习是为了找到方法
    • 学习不是找答案,而是找到通往答案的方法
  2. 学习是为了认识原理和本质
    • 理解原理和本质就可以一通百通
  3. 学习是为了打开自己的认知
    • 你不知道你不知道的东西
  4. 学习是为了改善自己
    • 思维方式 - 更为的逻辑和科学
    • 行动方式 - 更为的高效
学习的相关方法
  1. 挑选知识和信息源

    • 第一手资料非常重要(英文非常重要)
  2. 注意基础和原理
  • 我可以忘了这个技术,但是我可以自己徒手打造出来
  1. 使用知识图系统的学习 (read the fucking menu)
  • 通过知识关联可以进行“顺藤摸瓜”
  1. 举一反三

    • 用不同的方法学同一个东西

    • 学一个东西时把周边的也学了

      学http也看看http1/http2/socked/Tcp/Ip

  2. 总结和归纳

  • 形成框架、套路和方法论
  1. 实践和坚持

    • 实践才能把知识变成技能,坚持才能有沉淀
学习的一些技巧
  1. 如何阅读代码

    • 基础知识、文档、代码结构
    • 模块、接口、关键业务路径
    • 代码逻辑、运行时调试
  2. 如何面对枯燥和硬核的知识

    • 找到应用场景和牛人

    • 补充基础知识

    • 咬牙使劲啃

      啃一本硬核的书,看自己能不能完成,看看完成后是不是多巴胺分泌上升,是不是兴奋,而不是说卧槽程序员坑真多啊

  3. 其它小技巧

    • 不要记忆
    • 把信息压缩
    • 经常犯错
    • 写blog
    • 它山之石可以攻玉

闲聊:

  1. 关手机是个重要的事,做到不被打扰。最短作业先处理,整块时间留给重要的事。
  2. 问产品经理你到底要解决什么问题,可以减少70%的需求。

  3. 年龄问题:

    • 20-30要敢于冒险。多学习。
    • 30-40职业成长的最后十年
    • 40-50 还可以折腾的最后十年
    • 50-60 还有精力的十年
  4. 一定要上升到更高的层次,不能一直搬砖,你搬不过25岁的那些人,对一个领域要精通或者做一个管理者。

  5. 推荐算法主要是找关联信息,例如:抽象出哪个商品和哪个商品有关联。

  6. 要成为自由职业者,坚持把原理吃透了,多写博客,树立影响力,教别人,别人有问题能来找你。弄绝大多数人不会的。

  7. 区块链不可能成。

  8. Node.js别玩,php没前途,php转go自然点。
  9. Java像是有城市规划,其他的语言都是拼凑,没有什么架构,一堆东西在拼凑。
  10. 但是要不要学,当然都要学,但是要确定好吃饭的那一个 。

并查集

发表于 2019-11-26 | 分类于 数据结构

Trie(字典树、前缀树)

发表于 2019-11-19 | 分类于 数据结构

123
WarriorYu

WarriorYu

Stay Hungry. Stay Foolish.

30 日志
13 分类
19 标签
GitHub E-Mail
© 2020 WarriorYu
由 Hexo 强力驱动
|
主题 — NexT.Pisces v5.1.4